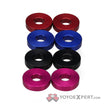
I’m not very far yet. I started by turning this chuck mount (? no clue as to the right terminology) to attach my yoyo puck to. Unfortunately, the face isn’t perfectly flat, so I may have to retry with an actually flat/planed piece of wood.
You can just turn the face flat.
Worst video.
Turn it flat with a squre end scraper. Check if it’s flat by putting the shaft of the tool along the face.
You will want to turn that chuck down to me be tapered at the sides too to allow access to rounding off the edges of your yoyo halves.
I turned the edges down and will probably taper even further before the next half.
Here it is with the puck (2 1/2” diameter, 3/4” thick). I secured it with the tail stock, but it’s not in the picture.
And after much ado, here’s my first attempt at a maple half.
That should work nicely! I would just suggest drilling the axle hole while it is mounted on the lathe.
It’s a pretty hefty yoyo half. It needs to be thinner by about 1/3 I think.
But I think I’ll try to match it and keep going just to get one under my belt.
I anticipate it’s going to take practice and/or a different method to get consistent shoulder curves.
I’ve also got some cherry and paduk and purpleheart for whenever I get halfway decent. Or quarterway decent.
That would definitely be ideal. I don’t have a drill chuck right now, so I’m going to have to rely on a press for now. Hopefully I can get a drill chuck soon - I imagine it would have a big impact.
Go for 15mm, whatever that is in the weird, weird world of imperial.
Ahh yes 15mm - just a clean 0.5905512 inches over here in imperial land ![]()
I noticed Colin of TMBR used a guide like this for consistency.
Are there other good ways to get consistent gap curves from the circumference toward the axle?
nah it wasn’t that bad at all. actually that video just made me see all the hard work you put into each spinworthy throw !!!
I do some tapers and then eyball the curves.
To do the tapered sections, I draw a circle to mark the edge of the inner wall while the half is spinning on the lathe. Then, I mark the outer edge a couple of mm in. Then I turn that section marked out on the rim down to the inner wall flat. From there I start turning whatever curve I want by eye. I hope that makes sense.
Yes! ![]()
That was a very basic yoyo, it can get far more involved than that.
it didn’t seem very basic to me ![]()
~~For the longer taper cut, would you approach from the curved side or from the flat side?
And would you use a flat scraper or a curved scraper or a spindle gouge?~~
Never mind, I just rewatched your video and saw you approach form the flat side with a flat scraper.
(Also, this all makes me appreciate every hand-turned throw like 1000% more)
Update! I tried again today but started from scratch to make some adjustments after yesterday’s first try.
