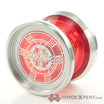
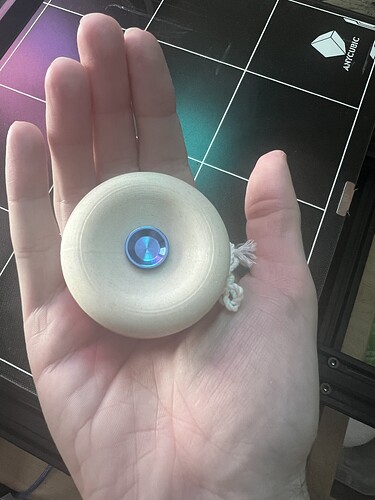
Trying some updates on my Pixie. I’ve bumped the axle up to 5/16” (from 1/4”). I’ve swapped from a hole based response to my “tic tac” response. I beefed up the rims a mm and change. And I’ve pushed all the weight to the perimeter, so the center is now mostly hollow. I did forget to turn on random seams on this one, so it has a highly visible one ![]()
I can’t wait to get it glued up and see how it plays!
That’s looking great dude! It’s like the best of both pixies.
Thanks! That was the goal of some changes. I think the bigger rim is going to play very nice. I had originally attempted to give the Pixie an even weight distribution to emulate the feel of wood, but as it’s an homage to the Butterfly, I think hollow may be more appropriate. That said the axle size change is very not Butterfly, so we’ll see how that plays.
All that said these do tend to come out a little lighter than I like for play, so I’m going to try to pack on some more weight too. This one is 40g without the axle and glue, so I hope it’ll get to 43 when it’s done. I like 48 or 49 a bit more.
are there any functional differences (e.g. vibe) with different seam settings? ive tried both with seams and without, and sometimes i get a smooth throw and others i get one that pulses so hard it falls off the string
This hasn’t affected me that much but I’m printing fixies and a little vibe is ok ![]()
For me the seams make a visual difference. I prefer not having a single seam and distributing it.
Scarf joint have been really nice for hiding seams that and aligning the seam down an edge or in a less conspicuous spot
New for me technique on the green Cardigan half. It’s multipass multicolor, so the snowflake graphic is flush in the first layer!
That green one looks so cozy, dude! ![]()
Multi pass looks sharp
Patients or trashcan
Even if you wind it back up my experience is that it locks at some point which causes normally more damage.
First we cry. Then we curse. Then we carefully re wind the spool. Mess up. Start over. Break it half way. Throw the remainder in a bucket full of silica for a week and ignore it. Then try again and eventually get most of a spool made. Print with it and hopefully not snag randomly.
Repeat till it’s gone.
sounds like a lot of fun
interesting art piece, not very practical. might sand it. still quite a bit of vibe, and the bearing seat keeps falling off, so im thinking of using m2 screws instead of m4. otherwise works pretty well.
waste of nice filament, but at least it looks pretty cool
Tiny print experiment. String centering bearing blank for fixed axle play. I’ll call it 3/4 spec, halfway between a half and full spec bearing in width. Printed at .05mm in ProtoPasta HTPLA. Seems to work pretty well and not free spin as long as I don’t put one in a CLYW.
Mom, can we get a plastic blood cell?
Don’t be silly, we have plastic blood cells at home.
3D printed RBC using freshly dirty stem system with a half spec c bearing.
Ohh man this makes me want the upcoming plasm more. Neat though. I bet the A bearing stems would get it a tad closer to the right feel
