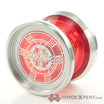
Thanks @cowmamba. I’m happy to report that they play as good as they look!
Sign me up, please! ![]()
These are awesome. If you’re selling the STL files for personal use I would love a chance to try my hand at printing that. Or if not if you do a run for folks here I’ll get in on that too
Calibration of the printer (and slicer settings) solves tons of issues. Tramming the bed is one of the most overlooked culprits, especially in budget friendly machines (I don’t know what machine you have but in general enders and the clones are what I’m referring to) Mostly due to the thickness of the bed and /or the mounting plate. On more budget friendly machines, these beds tend to be thinner so they are more susceptible to bending or warping over time due to temperature fluctuations and continuously rapid heating and cooling.
I know it’s a huge pain to print off calibration prints, make adjustments, do it all over again and again and again and again and again… LOL! It’s totally worth it though in the end. I have to admit I am a bit lazy when it comes to the upkeep after I calibrate and establish a good reliable setup. I only re-check when an anomaly start to show up after hours and hours of printing. So far this process has not let me down but I certainly could be better, haha!
Don’t forget to calibrate your settings for each one of the filaments you are using. Always print a test swatch anytime you get a new filament. (linked below) All PLA, PET, ABS, ASA, etc. print differently from each other. The numbers printed on the box are just a starting point, some will require more or less heat than what’s labeled. Other things can contribute to melting variances too. Things like what kind of material the nozzle is made of. Is it brass, copper, steel, ruby? A combination of all alloys? How long is the filament path and meltzone, you printing direct drive or do you have an all metal hotend? Different alloys will change the conductivity and cause different temperature requirements. It’s just something to note if you’re having major extrusion issues, you may not be extruding enough or extruding or oozing too much.
Another thing about filament, you can have two identical colored filaments from different brands and they’ll print and act totally different from each other. The color of the filament can also cause issues. Some colors are more temperamental than others due to the type of pigment used. Some pigments have larger or smaller particles than another and some filaments have more pigment to achieve certain colors. Some colors are also more abrasive than others. White is a good example, it’s actually pretty abrasive while other colors are not as abrasive. This is due to the fact that it takes a lot more pigment to get a bright white color vs something like black, where it takes very little to get to that color. If your filament has glitter or other particulates in it, this can sometimes mess with the accuracy of a part if the additive isn’t in the correct orientation when printed. It’s usually not an issue, but if you struggle with a filament that has sparkle but not with one that is a solid color, it could be something to note.
Also, if you print with a more abrasive filament often and you have a standard brass nozzle, you might need to make sure it’s still in good condition if you notice prints aren’t coming out well and you’ve exhausted all other calibration avenues and nothing seems to remedy the issue. Over time abrasive filaments will cause the nozzle to wear out and it will need to be replaced. Switching to a hardened steel nozzle will help with this issue though.
One other tip to add to @Captrogers and @TheThrowingGnome already great tips would be to try and do all of the calibrations first before changing hardware. Anytime you upgrade a part you have to start all over again! Another tip would be to set some variable layer height rules in your slicer when you’re slicing. Especially with your issue and bearing seats, a VLH might be what you need.
VLH guide for prusaslicer | VLH guide for cura (I don’t use cura so I don’t know how up to date this is) Another good resource
You can print the main part of the body at one height and then change it to a higher resolution as you near the bearing seat and post. So for example, you can print the main body at something like, 0.24mm and set the bearing seat height at 0.12 or 0.08mm (or higher if your printer is capable) - this will ensure you’re getting a super high-detailed line where you need it and it might improve your accuracy issue. It really depends on how much variance there is within your line thickness and bearing clearance. The only issue is, if you don’t get good adhesion it can make the part more brittle if it’s not getting good adhesion or the lines are too thin. In general you may try printing it in different layer heights before trying VLH as well.
Here are the links for some of the calibration prints
Calibration rings - These are great for dimensional accuracy. Something we need when printing yoyos. It can help with printing more accurate cylindrical shapes.
Another calibration ring - This one is good for flowrate and extrusion multiplier / steps per mm.
Test Swatch w/ calibration elements - I really like this one because it gives you tons of different options to tune for. It can be a bit daunting and you may not be able to get everything to print perfectly but it helps you establish a good baseline and if you’re happy with the way it turns out you don’t have to tune for every single element.
A Smaller version of the previous one - Basically the same as the one above, it’s just smaller and prints a bit faster. Here is a small tray to fit them into
Filament sample swatch - This one is nice because it has holes and transparency variances
Thin walled calibration cube - These are good for tuning for symmetry and making sure all of your axis are lined up and working well. It also serves to help calibrate e-steps and flowrate. Since it’s thin walled you can also use it to evaluate Z wobble but a taller model would probably be better if you’re trying to calibrate z.
Thanks for the interest @Captrogers & @Ardeus! I am assembling a few more to have ready before the end of the week. I may provide the .stl and assembly details, but you’d also need all of the slicer settings to be able to replicate the weight distribution and color change. I’ll see if I can get everything all together for that and try to make available as well.
That feeling when you bought a Bambu A1 on release day and now there is a massive recall and they tell you not to run it anymore for fear of fire….
Supposedly its only 0.1% of machines sold… I’d run it ![]()
Must have plastic things
Looks like they are offering some decent incentives for keeping it and / or sending it in though. Good excuse to upgrade haha!
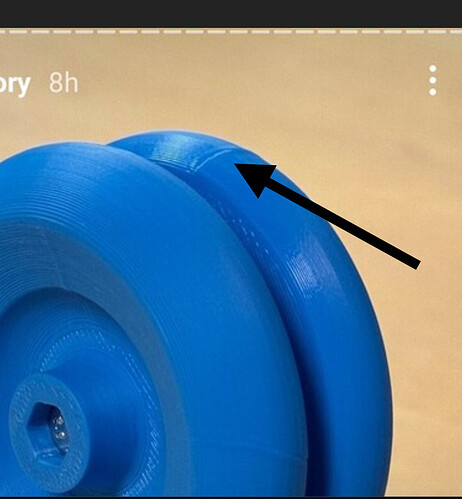
The aligned seam is unsightly, but Ive found it makes for a slightly smoother throw vs random seam. For responsive play the tiny artifacts from random seam create an amazing control and response. For unresponsive it just feels like vibe.
I’ll only be content if they also sell/share the STL file. Or even go fluid route and offer to sell the guts to those willing to diy
Otherwise it just looks like a loop 360 with a 3d printed body to me
The “Grown to be Thrown” Trademark still leaves a lot to the imagination.
Has to migrate my stuff to the garage. Upgraded firmware from stock to mriscoc which has been neat. Also changed from a glass plate to a flexible pei and man is it easier to remove a print
What’s that blue disk under the top board?
That’s a Wham Bam thank you mam Cloud (that’s actually what it says on them) and there is one under the bottom board too. Emergency fire suppression. Activates with 3 seconds of flame contact and throws flame retardant powder everywhere.
Hope that wasn’t something you learned to install from experience.
Fire is always a possibility with these things. Too many hot moving parts and cheap wires. The A1 multicolor printer on the bottom was just recalled for fire hazard!
Having these and multiple cameras watching everything helps me sleep at night while they are running.
