Huge thanks to Jeremy McKay (MrYoyoThrower) for sending me a Raincity Skills Show Girl to be the star of the show!
Hey guys! So one of the questions I get asked pretty often is how do I manage to get a mirror polish on a yoyo? Well, as the saying goes, there’s more than one way to skin the cat (or gerbil since we’re yoyoers?). You can definitely just chuck the yoyo up on a drill and start with some rougher grit sandpaper to remove the anodize and then continue up to finer sandpaper for a mirror finish, but this guide is about how I usually strip and polish yoyos. This is the easiest method I’ve found, and I’m going to show you how to strip and polish a yoyo properly, without causing vibe like most people are worried about. Also as an exclaimer, I’d like to say I will not be at fault for any injuries sustained while doing this, attempt to do so at your own risk.
First thing, make sure the response area is removed of any gunk from the response pad or any silicone that was stuck in the groove. Anything like that can protect the anodize from the chemical we’ll be using. The most important part to preventing vibe while stripping the anodize off a yoyo is protecting the bearing seat. When someone says they caused vibe by chemically stripping their yoyo, I am willing to bet they did not mask the bearing seat post properly. Keep in mind anodizing is a dye that’s in the surface of the yoyo, by stripping the anodizing off, we are literally removing a thin layer of the material, and it is just enough material to throw off bearing seat tolerances to where it can induce vibe. The whole bearing seat doesn’t need to be protected, just the post, as that is where the tolerance matters the most. The picture on the left is how anyone can set the yoyo up so the bearing seat post will be protected. There’s an axle, a nut, and the inner race of a bearing. You can pretty easily break apart a couple cheap bearings for this purpose. I wouldn’t recommend using a full bearing, while it would still mask of the post, the rest of the anodizing wouldn’t be completely stripped off and would look pretty ugly. The picture on the right is how I would normally set up a yoyo for stripping. I prefer to keep the whole bearing seat untouched, the white piece is a small piece delrin that i cut to fit in the response area, and then is tightened down with a bolt.
So quick chemistry lesson. The chemical that strips the anodizing off of aluminum is sodium hydroxide, with the formula NaOH. NaOH is pretty often found in cleaning supplies, such as grill and oven cleaners, and drain uncloggers. You’ll find other throwers have been successful with using Draino to strip their yoyos, but what I’ve found to work the best is Easy Off Heavy Duty Oven Cleaner. It’s about $5 a can, and can strip quite a few yoyos, I’d estimate around 6-7? I’ve tried other brands of oven cleaner, the odorless version, the grill cleaner version, but none have worked as fast or as well as this specific kind. So just spend a dollar or two more and get this stuff. Warning, NaOH is nasty stuff, and can give you chemical burns if you get the chemical on your skin, so gloves are an absolute necessity. The longer the better, preferably elbow length, I’m a professional so I can get away with just disposable gloves. Also, do this in a well ventilated area, it is an aerosol so you should be in an area with as much fresh air as possible.
Onto the actual stripping. Find a large sink in your house, one that’s fairly deep, you can use the kitchen sink if you want, just make sure to clean it well afterwards. I used a sink that’s in my laundry room. I would not recommend using a bathroom sink, as you don’t want to spray the Easy Off out of the sink. The first picture shows the first coat of Easy Off on the yoyo. Spray the first coat on, wait around 15 minutes, then take a toothbrush and scrub the yoyo half, afterwards, rinse off the chemical, and dry with a towel. The second picture shows the half after sitting in the chemical for 15 mins and after scrubbing. You’ll want to repeat these steps until all the color is off the yoyo. The third picture shows the half after 3 coats and about 45 minutes. I find with most yoyos it takes about 3 coats for the color to finally come off. I would suggest doing one additional coat if you’re not sure, it’s important to remove any of the anodize off the yoyo now, to make polishing much easier. Once the half looks like the third picture, remove the anodize from the cups. Just fill the cups with Easy Off like in the fourth picture. I just placed a dice counter weight under the yoyo so the half can stand on its own. It took about 2 coats in the cups to fully remove the anodize. Once all the anodizing is removed, the yoyo will look like the fifth picture. Side note, some yoyos will strip to a very dark almost black color. This has happened multiple times with 7075 yoyos for me, this doesn’t really mean anything, and will come off with sanding.
You’ll probably notice the bearing seat looks pretty ugly after stripping. To clean that up, don’t use sand paper, just take some 0000 grade steel wool, and rub it into the bearing seat. I like to bunch up the steel wool and press it into the bearing seat and response area while turning the yoyo on a table, after a few turns the bearing seat will look much cleaner, like in the second picture. Also notice the anodizing on the post has not been disturbed.
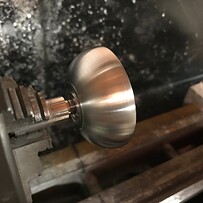
I’ll be using a lathe to polish the yoyo. If you have a lathe, this is how I chuck the half onto the lathe. I turned an aluminum rod into basically a bearing seat, and tapped the piece for an M4x0.7 axle. I made these in 8-32 thread size as well, as these two are the most common thread sizes. The reason for making this small part is it ensures the yoyo half spins true, or without vibration, on the lathe. For those of you using a drill, you can actually set the half up the same way you did when stripping the half, just clamp the axle in the drill. If the half does not spin true, loosen the nut, unscrew the axle slightly, tighten the nut, and test if it spins true now. Adjust the axle until the half spins properly on the drill.
The brand of polish you use isn’t really all that important, but the type of polish is. The type of polish you want to use is a paste like polish that is applied with a paper towel. These two are a couple I’ve used with good results, I would recommend the Mothers polish more. Make sure whatever polish you decide to use specifically says it’s used for aluminum and other metals.
Onto the tedious part, the actual polishing. Wear a dust mask while sanding, aluminum dust is very harmful for you to breathe in. I wore a disposable glove to keep my hands and fingers from turning black, but you’re actually really not supposed to wear gloves around rotating machinery. Also wear either a very dark colored shirt, or an old shirt. You’ll be wet sanding, which can get very messy. The important part of polishing is to go up the grits of sandpaper, up to around 2000, try not to skip more than 200 grits at the beginning, once you’re over a thousand the grits go by 500s anyway. You can go higher than 2000 grit but I don’t really notice much of a difference then. How I polished this yoyo was I started at 400 grit as the Show Girl was mint and had no damage. I started to wet sand at 600 grit. Wet sanding is just dipping the sandpaper into water. When buying the sandpaper, read the package, the package will say if you can wet sand. The first picture is after wet sanding with 600 grit and wiping the water off. Try your best to get into any crevices and not miss any spots with each grit, and wipe the water and debris off after each grit. The order of grits I went was 400, 600, 800, 1000, 1500, 2000, 2500, and 3000. I went up to 3000 for the purpose of showing the best possible polish I could. After 3000 grit, rub the yoyo with the 0000 grade steel wool, trying to get into every part as well as you can. The second picture shows the half after the 0000 grit steel wool. Doesn’t really look too different from the first picture, but the polish will fix that. Buff the half with the aluminum polish, I just apply it with paper towels. After 2-3 applications, the half will have an extremely nice shine to it, like in the third picture.
This part is optional, but I would really recommend it. If I’m just leaving the metal raw, I apply a layer of renaissance wax to the yoyo. Renaissance wax is used to preserve the shine on metals and prevent fingerprints and oxidation. The wax is fairly expensive, this small tin costed me $15. Apply it with a paper towel or a cloth, let it sit for a few seconds, then wipe it off. Needs to be reapplied every now and then but should protect the metal for a while.
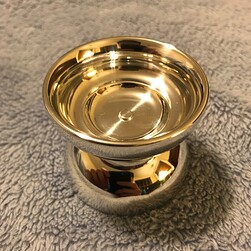
And now you’ve fully stripped and polished your yoyo! If everything went well, the yoyo should still be as smooth as before, and looks like the yoyo in these pictures. If you have any other questions regarding the process, feel free to shoot me a message on facebook or you can find me as Yoyospirit on YoyoExpert and Instagram. Good luck!
