Looks better if I turn on ironing ![]()
Here are some things to try
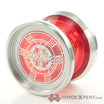
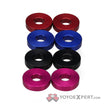
First unresponsive! Honestly kinda a player. Next step is to make steel bearing rims for different weight distribution in a smaller package. Oh and adding caps so you can’t see the ugly support areas.
Profile looks beautiful!
Nice. Did you use a hardware kit?
Thank you! Figured I’d start with a high wall and work from there.
Profile looks very clean with the seam in the cup instead of random seam. I think the tiny random seam blobs just translates as vibe against the string during play with unresponsive printed yo-yos.
I actually still have a seam on the outside, I just got lucky with the photo angle. Is there a way to get no seam on the outside? I prefer the seam for 3d printed yoyos in general over random.
You should be able to do a “paint on seam” and paint it in the cup and through the axle hole.
Hmm when I try it places a seam on both the inside and outside. Must be a setting I’m missing. I’ll find it eventually.
While painting the seam:
Use the right mouse button to “block” the seam over the entire profile of the yoyo and use the left mouse button to “enforce” the seam on the cup. It may not remove every bit of it,but should help a lot.
Make sure you are painting with circle and not sphere too.
Okay I tried it and it seems like it just randomized the seam. The inside one is clean though. Does this have an affect of printing that the slicer doesn’t show? I also have a bambu labs machine so I’d expect to get similar results to what you’d get.
I haven’t tried it in Bambu Studio yet just Prusa Slicer. When I do it I get a similar result, but the random seam seems to be much less than usual at least. Maybe it’s just my imagination.
If you paint the seam on in the cup, but select random seam, it will do random on the profile and and random within the painted area in the cup. This may be best it can do?
I’ll do a couple tests to see if it has any affect. My intuition tells me you cant remove the seam from one side though. The print head has to start and stop somewhere. Maybe somebody can develop a vase mode that can do more than wall thickness.
Yeah that makes sense now that I think about it. Maybe the new scarf seam they are releasing will improve it.
you could try orca slicer and see if you can eliminate how much the seam comes through with scarf seams.
I’ve been fighting my printer with the skull counterweights I’ve been printing. For some damn reason I can’t get them to consistently print. They either print PERFECT, or not at all. I finally got the model exactly the way I want it, though. Just gotta figure out how to get them printing when I want them to ![]()
Of course, after that I’m gonna try a translucent resin, which will probably need different settings to use.
I’ll definitely give this a shot thanks!
I do not know your tech setup but there is potentially an issue with the model since it comes from a point cloud so the bottom is not flat. Maybe you slicer is a bit confused where to start from. I had these kind of issues in the past. But just a wild guess
