Overhangs are your enemy either avoid them, change the design to have 45degree slopes instead or use supports or print stupid slow. On that layer.
You could chamfer the edges of the notch and it will print cleaner.
I’m excited for this new orca feature to hide z seams
Release OrcaSlicer V2.0.0 Beta Release · SoftFever/OrcaSlicer · GitHub scarf joints!
I saw that the other day. Very exciting. I bet it’ll be in all the slicers soon.
This weekend was printing for the printer. I dislike these prints because I don’t know what will work out and what’s pointless till I try some of them but I figure it won’t hurt to print some junk pla in the roughest lowest quality I can and if they aren’t terrible then print these in petg at a better quality for aesthetics and then they won’t melt…
edit:
the roller and filament arm already feel like valuable additions.
I now dub this weight “The 45”. Everything is 45° angles. I’m pretty happy with everything except maybe the alignment of the knurling. I might go for a different texture as it’s a smaller surface, but I do think I’m going to shelve this design for a little bit and work on other things.
I got my raspberry pi kit in today, so I’m probably going to start setting that up and maybe printing an enclosure to mount on the printer.
Well today has been an adventure in not printing. I got an octopi unit running pretty quickly but it requested I update the firmware on the printer and that was an odyssey. First print running now but tomorrow I need to hook up the pi cam.
If you want to take good captures of your prints I would def recommend installing this here. The default octo recorder is mmmhh.
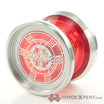
Well, here it is, my first modeled and printed yo-yo. I’ve tentatively named this one “The Pixie.” It’s Butterfly shaped with fingerspin dimples and a 1/4” wooden axle. I left the top layer open to make a response system on the inside. Right now it’s press fit together but I’ll probably glue it eventually. Comes in a little light at 42g. I like it a little heavier. I have a few tweaks to make; the edges are too sharp and the dimples too pointy, but all in all I think it’s a pretty good rookie outing.
I designed and 3D printed a bearing mount and a cap to turn PX3 knob for a juggling club into a counterweight. I’m brand new to 5A so I have nothing else to compare it to, but it feels good so far and doesn’t hurt that much. I recall the mass being around 12g.
Here’s my second attempt. I’ve lost my 1/4” dowel stock somewhere so I’m sharing my one axle ![]()
Its basically right on the shape. 46g, edge is soft enough to play (but might round it just a tiny bit more), dimple is very good. I think I need to print one more with response holes to see if I prefer it.
Today I’m upgrading to dual z and added gantry supports. And some of the prints I made but some didn’t survive my toddler messing with them
Printed a 6 hole response (on the right). Still testing it with a plastic horizontally printed axle. I think I personally prefer the original response, but the weight on this one is a nicer 53g. The outer edge came out a little worse with a larger fillet and concentric bottom layer infill. I might go with the sharper just for cleanliness.
Lookin good. Sometimes lots of small chamfers print better than fillets. ![]()
I investigated after I printed and I think I accidentally enabled supports (I was trying to print an axle with it) and so I think the rough edge is because it decided to add a tiny bit of support material that is proving difficult to remove ![]()
I’m also toying with the idea of flipping the print to do an engraving or design on the face, which I think would help with the fillet.
Newest print of The Pixie is on the right. A few things went well and a few things didn’t. This is my first print response holes down. The holes came out just fine. I added a 2ish mm rim, which I like. I tried a subtle inscription (it should say “try catch throw”) which, in addition to not coming out at all, creates some printing artifacts around the inscription that I don’t really care for as it looks way less clean. Rather than reworking the inscription I think I’m going to abandon it. I also accidentally closed the fingerspin dimples, so I need to re-do those.
I have designed some tools to press fit the whole assembly together. Press fitting a horizontally printed axle is actually working rather well; the halves haven’t separated at all in the older print and I carried it yesterday in my work bag.
I wonder if the friction from the string is enough to heat and deform a printed axle during play with hard throws?
Hard to tell peeking into the gap.
I did pick up some 1/4” and 5/16” dowel stock over the weekend for making axles; I just haven’t gotten around to it yet.
Hasn’t yet but if that’s a concern then the response area would be a concern too.
I imagine it could deform but petg would be the solution if pla is a problem.
