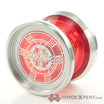
I really like that design. The lettering probably needs to be bigger and I imagine your printer needs a bit of tuning to get the lettering more crisp. You could also try to use a smaller nozzle and bump up the quality settings in your slicer (which will increase print time)
I don’t think the response area is an issue. I’ve never scorched the body of a yoyo, but definitely scorched an axle or two. I think if it gets hot enough to burn wood it’ll be an issue for petg too.
The Pixie. Final-ish form. Might work on the engraving. Along with a few tools for setting the axle.
I opened my oldest plastic axle version and I am cutting lines in it with poly. I’m planning to glue the axle into this one with two part epoxy.
My 1/4” dowel stock is def not 1/4” ![]()
I’ve been thinking of printing this silver one for a while now. I call it IGBY, “It Goes Both waYs”. I have a printed axle sleeve, which I don’t love and is too big anyway, and I’m going to need some real hardware to hold the thing together to play it.
Here’s a wood axle glued up Pixie.
It occurs to me that I should use clear epoxy…
Also I think I’m going to close the fingerspin cap to the axle for cleanliness.
But I think the newest engraving worked well!
Looks great! It’d be easy to a color change to make the engraving pop too if you have other colors of filament.
I like JB Weld Plastic Bonder epoxy.
What infill % did you use?
The blue one is 70% and lands at 53g. I’ve printed this silver one after at 60% and 46g that I think I prefer weight wise.
I’ll get some clear epoxy after spring break. I decided that closing the dimple would probably necessitate too short an axle without adjusting the depth, so I skipped it. It also complicates the print as it would be an overhang printed in either orientation.
Building up inventory for an arts, crafts, toy store and yoyo museum we are trying to open this year.
The beauty of infill. Doing a print for work on the X-Plus 3. Love this printer so much. Tons of support material on this one.
Are you painting these or can you print in different colors?
Printed with a Bambu A1 with AMS lite. No paint. Machine is amazing. Hopefully it won’t catch fire before they send out replacement beds.
This was a last minute print before vacation. These are pin trading boards. Unfortunately they were a little rushed, so the display portion is just a tiny bit too thick, so most of the pins would lose their backings over the course of a day, but the boards were all contained in a ziploc so we didn’t lose anything. I’m planning to modify and reprint for more permanent display maybe. They are a gyroid infill with no top or bottom layer and large perimeters.
Are there any good, currently available hardware kits for 3D printing a bearing yoyo? A cursory search of the internet has not turned up anything available.
Get in touch with OD via mail they always have kits.
