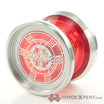
First off, there are two types of satins. The first and most commonly mentioned is done on a drill. The other is a “Spiral Satin”. The point of satining is to make these “Grooves” in the surface of the yoyo so it will grind better. Some people say spiral satins grind better than regular, but I have yet to find a difference. Personally, I like the looks of spiral satins better, which is why I do them, but you can choose your own method. You can also satin for aesthetics. But, enough of that, lets get on to how its done.
Things you’ll need
- Yoyo
- 150 or 200 grit sandpaper
- Spare axle
- Drill (If your doing the drill method)
- 350 grit sandpaper*
- Steel Wool*
* optional
Drill Method
- Remove all of the guts from the yoyo.
- Find your spare axle and screw it in.
- Chuck the axle into the drill.
- Turn the drill on.
- Sand the surface of the yoyo with your course sandpaper until your satisfied with how it feels/looks. I like to sand for a few seconds and then turn it off and see how it looks. And then repeat until it feels good.
- I like to use 350 grit sand paper and go over the whole surface quickly so it feels nicer.
- Some people also go over it with steel wool. If your going to do that do it lightly and don’t do it long!
Spiral Satin Method (Non-Drill)
- Remove guts of the yoyo.
- Take your rough sandpaper and start at the outside of the recess and work your way out. It should look like this after one pass.
Keep going untill its completely covered up.
3. Repeat with 350 grit sandpaper if you wish.
4. It’s kinda pointless to use steel wool on a spiral satin, but I guess you could.
There you go! You have a satined yoyo!
