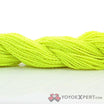
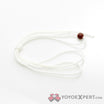
This is a megathread with information and resources to get anyone started on this craft. I will list some resources, recipes and available materials at the bottom of this post.
There are many different kinds of strings, many different types of thread, many different types of rigs, and many different types of recipes. I will share some basic recipes and rig setup ideas to get you started, and from there you can experiment as you please until you land on a recipe that suits your preferences. If you are like me, you will develop a basic recipe that you occasionally make tweaks to because the process is fun, and there are always new ideas to tweak or improve recipes and rig setups.
A summary of the process:
So you have two anchor points that are 12 feet apart, and a center anchor that is a little bit less than halfway from your starting anchor point. This is your most basic rig.
You tie off your thread to your starting anchor point and wrap the thread around the farthest anchor point and back 6 to 8 times. From your starting anchor, to the farthest anchor and back is 1 full wrap. So usually anywhere from 6 to 8 of those.
Wraps – the number of wraps is one aspect of developing a recipe that is easy to play around with. The fewer wraps, the thinner the final string will be. The more wraps, the thicker the final string will be. You can even do half wraps. You’d be surprised at how much difference a half wrap can make.
Let’s talk reduction. A typical string reduction is anywhere from 10-15%. For the purpose of this summary we will just go with about a 12% reduction. This is where math comes in. So 12 feet is 144 inches. 12% of 144 is 17.28. For Simplicity sake, we can round 17.28 down to 17.25, which is 17 1/4 inches. Simply use your tape measure to make a mark 17 1/4 inches. away from your second anchor point.
Now we reduce. Make sure your drill has a hook loaded in the tip, and is set to spin clockwise, and spin spin spin! You will notice that the string begins to reduce in length, hence “reduction”. You want to keep the string taught but not too tight while it’s reducing, just enough tension to keep the string from binding up on itself. And stop the drill when you reach your reduction mark.
Reduction – reduction is another aspect of the recipe that can be played with and adjusted. some people like a really high amount of reduction and others prefer less reduction. More reduction will give you a tighter wound completed string, and less reduction will give you a looser wound completed string.
Remember the third Anchor Point that was placed slightly off-center between the two main anchors? Here’s more math for you (yay!). The location of that center anchor is going to depend on how much you choose to reduce your string by, because it is going to be half of your reduced string length. In this case, we reduce the string by 17.25 inches. Subtract 17.25 from 144 and we now have a string 126.75 (3/4) inches long. Half of 126.75 is 63.375, which is 63 3/8 inches. So, measure from your starting anchor 63 3/8 inches, and that’s the center point for your reduced string. Still with me? Hahaha
You are going to take the end of the string attached to your drill and double it around your center anchor and secure it to the starting anchor point. Keep the string taut during this phase, this is very important. If you let any slack in the string during this phase, you will end up with a rat’s nest of kinked and twisted string that probably won’t be salvageable. Set your drill to reverse and hook the string from the center anchor, lift it off the anchor and begin to relieve the torsion with your drill. You will feel when the string torsion has been completely released because while you are keeping the string taut, you will feel it stretch out and then begin to reduce again. By that point you have adequately relieved the torsion.
Doubling – this is what gives you that closed loop on the end of the string that slips around the bearing or axle.
Now pinch the string close to your starting Anchor Point and cut it with your scissors. If you don’t hold on to the string, it will just unravel quickly so you need to hold on to the string while you cut it. Tie a knot in it and vualla! That’s basically how a yo-yo string is made. The final string will most likely be several inches longer than you actually need, so put it on your yoyo and tie it off at its proper length with a loop.
If you want extra credit, figure out how long you typically like your strings to be, and make a mark that distance from your starting anchor so that you can just cut it at the length you like it to be right off the rig.
1. So, where to start..
Here’s a list of things you’ll need to make a yoyo string and/or a rig
- A tape measure.
- Something to mark with, like a marker, pen or pencil.
- At least 16 ft of space (you will need 12 feet of space for the string itself, so any extra wiggle room would be nice).
- A few hooks, or something to anchor the threads to. A nail, screw, or even a doorknob would work.
- A drill of somekind. I used both a battery drill and a Dremel. Just be aware that a Dremel will spin much much faster than a drill.
- Some hooks. I use the tiny little screw in hooks and small S hooks
- Some thread. You can use any thread, but there are specific threads that are tried-and-true in this craft. More on that below.
- Something to cut the thread with, like some scissors or a razor knife.
- Some people make their rig using a long 2×4, I made mine on an actual countertop in my garage. I just screwed all my anchor points right into the countertop
- And one last thing, it is not mandatory but I would suggest keeping a journal or a log to keep up with you’re recipes. There’s nothing more frustrating than spinning up a string that performs beautifully, but you cannot replicate it because you can’t remember exactly what you did.
2. How to set up a basic rig
You will need to start by establishing two anchor points. these two anchor points need to be exactly 12 feet apart. So if you need to, have someone help you hold the end of your tape measure right on your first anchor, then make a mark at 12 ft with your marking utensil and then place your second anchor right on that spot. I use screws as anchor points (3 inch green deck screws have a nice section of threadless shaft just below the screwhead).
Once you have your end anchors in place, figure out how much you want to reduce your strings by, and use the formula I laid out above to put a mark at your reduction sweet spot. The formula is basically this- What is [x %] of [length of rig in inches]. For clarification, the example I shared above would look like- What is 12% of 144 inches? The answer is 17.28 inches.
- Pro tip- If you suck at math like I do, you can always ask Google, lol.
Next, find your halfway point of your fully reduced string and put your third (center) anchor in place.
And that’s basically it as far as setting up the rig goes.
3. Let’s talk thread
So, for unresponsive play there are pretty much two main types of thread used- polyester and nylon. There are also several different types of each, all with unique performance properties. I’ll share a few of each, and this little list isn’t exhaustive by any means:
-
bulky nylon (I can’t find a link for this stuff strangely enough, but I found mine at Joann’s)
There are several different brands of spun poly, and the spun poly is all more or less the same afaik. Now, trilobal on the other hand should be in a category all of its own. Spun poly is your basic bulk string material. I’ll list some pros and cons of each below.
The nylons listed are all what is known as “textured”, and are more or less unique brand specific spools. These nylons are all technically the same, but they all act and feel noticeably different during play. A lot of people say they don’t like bulky nylon, but that’s all I had access to from my local store for a while and I learn to like it in a blend.
Spun poly
PROS
- Cheap
- Classic feel
- Largest selection of colors, especially neons
- Produces a soft string
- Slip knot stays pretty secure during play
CONS
- Wears out pretty fast
- Okay for whips and slacks
Trilobal
PROS
- Lasts. For. Ever. Seriously, this stuff does not wear out!
- Decent selection of neon colors
- Holds neutral torsion very well during play
- Whips and slacks beautifully
CONS
- Very course on the fingers, not pleasant
- Slip knot doesn’t like to stay tight
- Kind of pricey
Textured nylon
PROS
- Very soft on the fingers
- Has this lively springiness to it
- Holds neutral torsion pretty well during play
CONS
- Wears out kind of fast (not as fast as spun poly, though)
- Somewhat weak whips and slacks
A few more thoughts on thread before we move on. Threads come in different thicknesses, so if you make a recipe that is 8 wraps of trilobal poly, the same recipe using spun poly might actually give you a thinner completed string. You will have to play around with your recipes and find your preferred number of wraps for each different material.
4. Let’s talk about blending thread
Okay, so now that I have given a basic run through of typical thread used for spinning, let’s explore blending these threads.
- just a quick note on blending before we go any further- if you are new to this or if you’ve never spun strings before, I would suggest you go for a pure string first. That is, 100% polyester or 100% nylon. Blending materials can get pretty complicated pretty quick. But hey, if you feel led to start with blending, by all means go for it. Don’t let me stop you.
Why blend thread?
In short, the best reason for blending different threads is because it gives you the advantages of each of these threads in one string. For instance, my personal favorite recipe is a 50\50 blend of trilobal polyester and textured nylon. This gives the advantage of the longevity and whippiness of the trilobal, and the silky soft springy liveliness of textured nylon. You can explore with different ratios of each thread and also different thread types too.
Pre twisting the threads
Alright, this is where it gets kind of complicated and time-consuming. Pre twisting your blended thread actually makes a pretty noticeable difference. It allows the two materials to blend more evenly before you start reducing it. This seems like a good place for me to share my personal recipe, feel free to use it and tweak it as you please. I will explain the pre twisting idea below.
To start, I use a doubled rig set up at 12 feet, with a 17 1/4 inch (about 12%) reduction. Basically, two runs right next to each other, with only one center anchor. This rig will make 1 string at a time, I’ll explain below.
My recipe
My recipe does not yield the softest strings on the planet, but my working hands don’t mind them. These are high performance, long lasting strings. They keep their torsion well during play and also keep their shape nicely during slacks and whips. Don’t believe me? Try them.
- 50\50 trilobal and textured nylon (I’m currently using maxi lock, SO to Spool Thread for the recommendation)
- 7 wraps
- Pre twisted in halves (I’ll explain this below)
- 17 1/4 inch reduction
So, remember the “two runs right next to each other” thing I mentioned above? To start I do 3 wraps on one set, and 4 wraps on the other (3+4=7, get it? 7 total wraps). I run both, the nylon and polly, at the same time. So remember that each wrap is going to count as 2 since you’re using twice as much string. So, to clarify, tie off both threads (trilobal and nylon) to a starting anchor, and do your 3 wraps (from your starting anchor, to the second anchor, back to homebase, and back to the second anchor counts as 3 full wraps). Then go to your next set and tie off both threads to a starting anchor, and do 4 wraps (from your starting anchor, to your second anchor 2 times counts as 4 wraps).
wraps – you don’t want your thread sagging, but you also don’t want your threads too tight. Find a nice happy medium where they are snug
Now the pre twist. Take your drill with the hook in it and set it for clockwise. Hook the first cluster of threads with the drill and spin it at full speed for about 10 seconds, keeping the threads taut but not pulled too tight. There should be no visible reduction at this phase, only twisting. Repeat this step for the other run.
Next, consolidate you runs together by carefully transferring one end at a time so that you now have 1 string.
Spin spin spin! Reduce it by 17 1/4 inches, double it, and relieve the torsion. this is where you can use the S hook- you can put the S hook on the end of the string before you reduce it, and just link it to the hook in the end of your drill. this makes it easier to attach to your starting anchor after you double the string in half.
Boom, cut and tie it off and there you have it! A pre twisted, 50\50 blended, high performance, long lasting string.
5. Fixie strings
So, fixed axle yo-yos need string made out of 100% cotton. The reason is because polyester and nylon are actually both forms of plastic, and cotton is a natural fiber. The friction of the fix axle on the string will actually cause nylon and polyester to melt, eventually sending your yoyo flying. Cotton does not melt under friction. Now, I’ve heard of people blending cotton and polyester though, these are known as slick strings. I have only spun 100% cotton strings and cannot personally vouch for the process of blending cotton and poly. I’m assuming that you could blend two separate spools, one of each, or you could just use a cotton poly thread. I’m pretty sure they sell blended spools of thread.
anyway, the process for making fixie strings is pretty much the same, but remember that the thread will probably be a different thickness than what you’re used to, so you may have to do a couple of trial runs before you get a string that is satisfactory. Fixie strings need to be right in that sweet spot- too thin and the yoyo won’t respond, too thick and you won’t be able to do tricks very easily because it’s too responsive. So play around with it and see what you can create!
6. Some final thoughts and resources
I was introduced to spinning after watching Dylan Kowalski’s video on how to make the best yo-yo string. It’s a great example of resourcefulness.
The owner of the late great (but not forgotten) boutique string company Spool Thread was awesome enough to share his recipe after he closed down operations. These strings were highly coveted for a season of time, and this is the most in depth recipe I’ve ever seen. He also has a very in-depth list of materials and even has a section that talks about dying strings if you want to go that route. Please respect his Attribution Creative Commons Liscense if you decide to glean anything from his recipe.
Airetic strings actually has part of their website devoted to string school with several really great videos showing how to make strings with a rig and without a rig.
And nd here is a ridiculously ingenuitive rig that you may be able to glean some ideas from.
Head over to r/StringMakerz on Reddit if you don’t already know about them, it is a sub dedicated to string making kind of similar to this forum. It’s just another means of interacting with this community of string makers. Go post some pictures of your stuff, go ask questions, go share new ideas, go get inspired!
7. Advanced string theory
If you want to go the advanced string route, I suggest staying away from blending materials. Try to use the same material thread in different colors. But hey, if you feel led to blend different materials for any of these advanced processes, go for it!
Fades
shokata made a really epic walkthrough of making fade strings and shared it to Reddit. SunsetRiderRadi made a video explaining shokata’s walkthrough of fades. Here’s an example of a fade string. It fades in one way or another from end-to-end
Twists
Twists are pretty cool looking too. They look like a candy cane stripe.
8. Final thoughts
Pro tip – if you make a string that has a slippy Slipknot that will not stay secure to your finger during play, take the top two inches of string (including the knot) and rub it over a piece of beeswax a couple of times. That will make it nice and tacky and snug during play.
I am not a professional string maker, but I do make all my own strings. the processes that I’ve shared may be kind of biased to my own methods and preferences, but they work. The purpose of this was to give you a thorough introduction to string making. There are methods and materials that are tried-and-true, but don’t let that stop you from exploring new possibilities! If you can get the basic process down, you can use that as a foundation to try new things. String making is a craft, an art form, a form of expression. One wouldn’t think that a string can really make a significant difference in performance, but once you start exploring different materials and different recipes, it’s actually pretty surprising how different strings can be.
If you are new to this craft, welcome! I hope you found this inspiring! If you are a seasoned string maker, I also hope that this was inspiring to you!


