Alright guys, I’ve received a couple questions about the photos that I posted in my BST here and on YoyoExpert. I take photos seriously. This guide might get a little heady and pretentious, but I will try my best to explain every detail so that you understand the decisions I’ve made and why they matter. Yes, I use a lot of vague descriptors at times; please look at the photos to understand what you’ll be making. ![]()
I’ve been an advanced amateur photographer for about 13 years. I was professional for a brief period as a staff photojournalist at a local newspaper. It was extremely hard work and I was way over my head for the first two or three months. Then I worked for a different newspaper color correcting digital photos for the printing press. Basically, I sat in a dark room for eight hours and used Photoshop to manually color correct photos so that all the colors would be as the camera captured them; not as the printing software reinterpreted them. Now, most newspapers have automated software that does my job and it usually does ok. Not great, but the whole field has been decimated by automation and reporters armed with smartphones, so that’s a whole different issue.
Anyway, I’m quite experienced and I hope that I can help you. I’m not the greatest product photographer, but the following guide will help you inexpensively. I will provide example photos of yoyos that I took in less than five minutes, offer tips, and even critique my own work so that you can improve upon my design. Be warned: this is a quick and dirty setup. I once made many photographs for the guys at Square Wheels Yoyos using a large and elaborate soft box with three flash monolights at the paper’s little studio and honestly, I didn’t get the same repeatable results that I get now. If you have A/C studio lights, a large empty space, and willingness to try several different methods, you can go that route, but now that I’m no longer professional, I’m a little simpler in methodology. ;).
First of all, here’s the list of equipment. Remember, this is a guide, not an instruction manual. You will need to improvise and tailor my guide to fit your needs.
-
You need a camera. You can also use a smartphone, and many do with excellent results. I have a decent camera that I have setup semi-permanently because I have the extra equipment to do so. Your mileage may vary, but you do not need any fancy settings, abilities, or editing software beyond basic stuff that comes on your computer/tablet/phone.
-
You need a tripod. Don’t play around with this one. If you’re even remotely interested in getting repeatable quality results to sell yoyos, or anything you have, use a tripod. If you’re low on funds, but you have an old digital camera, you can find a usable tripod at any thrift shop, craigslist, or eBay for anywhere from five dollars to five thousand dollars. Seriously, the prices are all over the place and you need to think carefully about what you plan to photograph and how long you’ll be doing it for. Tripods are extremely important to me and, I could argue, more important than the megapixel count, mythological lens quality, aperture settings, or any other feature that Best Buy employees try to trick you with. I used to work at Best Buy, so I promise you that even a basic understanding of photography matters much more than a pile of pricey equipment. Finally, if you use a smartphone, you need a way to mount it securely to your tripod. You will also want to know how to use the shutter timer on your photo app of choice.
-
You need some way to fire the camera/smartphone either remotely or with a delayed trigger. I use a two second timer on my camera. This helps remedy any less than perfect cheap tripods. Shutter shake is a non-issue with digital point and shoots, so the biggest culprit is when you poke the shutter button with your finger. Bumping the camera robs you of resolution and makes all the work you did acquiring a tripod a waste of time. Don’t do it, ok? Ok.
Got that basic stuff? Read on to see where the real magic happens:
Now, you’re making a “light tent.” A light tent is basically a box with a seamless background and some lights. It allows you to mount your yoyo or other item in a fixed spot and move the lights as needed on a semi-fixed axis. It makes product photography much easier and dumbs it down to fit basic equipment without novelties or expensive thrills. Since the item is fixed and your camera is tripod mounted, you can use common house bulbs, not studio flash. You don’t need the mega-watt equivalent of flash because you are illuminating a small area, which by design will naturally reflect excess light on itself if you so desire.
-
You need four “shop lights.” You can find these in your neighborhood hardware store or a big box home repair shop. Mine have 8 inch reflectors (silvery hoods) and little clamps.
-
You need four identical bulbs. I use 100-watt compact fluorescent bulbs. They must be “daylight” balanced, not the “soft white” that you have in your house. The reason for this is that you do not want to give your yoyos the yellow-orange cast that your house lamps have, you want something white and even a touch blue. A cooler light will make camera settings easier and your yoyo’s colors more accurate and punchy. You want them to look good, or do you want them to look yellow?
-
You need a roll of paper. This is your background. I bought a white roll of paper about 24 inches wide for making party banners at an office supply shop. You’ll want a fairly long roll, but don’t buy excessively big rolls produced for print shops. You’ll use maybe eight feet a year if you’re careful with it.
-
Finally, You need parts to build a box frame with, ideally, a removable rear top bar. I say frame, because you want all sides to be totally open and exposed, not a complete box with panels. PVC pipe is very common and cheap, but you can also use wood, if you’re handy with a hammer. The box must be wider than your roll. If you are more adventurous and you want as consistently lit background as possible, you’ll want to make more of a rectangular shape. Mine is about 27-28 inches on all sides (square), but if you make a rectangle and you have the free space either on a table, or corner of floor, you can make it more like 27-28 inches wide and 40-50 inches long. Don’t go crazy, you shouldn’t need the size if you position the lights correctly to get the results that you want. You will not need a bottom support on one side. This is the side where you will put your item/yoyo into the box for the photo and you will not want to see ugly PVC pipe or a wood plank obscuring the yoyo from view. Please see my photo, if you’re not sure what I mean. You also want to make the structural bars thin enough so that you can clamp the lights to it. If you’re using PVC, go with an inch or an inch and a half diameter. It doesn’t need to bare a lot of weight, but you may need to use some wire or string wrapped through the light clamps and tie them to the PVC. My clamps were not strong enough to grip the PVC without slipping down, so I bought little wood working clamps to make sure the lights don’t fall off.
A few specifics on the PVC route
I went to Home Depot, a home supply chain store in the States, and stared for about 20 minutes at the selection of PVC joints and connecting knuckles to find the right parts. As I mentioned earlier, you’re going to hang the paper roll so that you pull it towards you to unwind it. You want it to spin freely enough so that you do not rip the paper when you unroll it from it’s position, but you also do not need it to spin so quickly that you unwind fifteen times as much as you need. I made the cross bar that the paper roll spins on removable by shaving the elbow attaching it until I can just pop it out, without having to remove a whole panel. You don’t need to do this, because as we’re not using any glue and your roll is fairly long, you should be up for the minor irritation of dismantling your frame to replace the roll in a few years.
Got the box made, now what?
Ok, so standing in front of the box, with the side that is missing a support bar facing you and down against the table or floor, you will thread the paper roll so that it unwinds counter clockwise from the top bar farthest from you. Said another way, you want the roll situated so that it unwinds away from you. You will unwind it so that it curves over the bottom support and then you should carefully tape it down to the floor or table under the front of the box. The reason for this particular unroll is very easy: the roll is already wound a certain way so if you maintain the natural curl of the paper, you will get fewer wrinkles as you unwind it in the future. You want the background to curve, and it should not be wrinkled if you hold the edge of the paper carefully in both hands. You do not want to wrinkle or pucker the surface of the paper by roughly grabbing it in the middle with one hand. It is not a projector screen and will not unwind neatly with a one-hand pull. Do not fold the back of the paper where it means the table/floor. The beauty of a seamless background free of folds or wrinkles is that you can show off you yoyo without distracting your prospective customers or friends by blemishes. It should be perfectly spotless and free of distractions. If you ruin the visible paper, pull up the taped edges, unwind some more, cut, and tape it again. You have s perfect new background after any accident. Glad you bought a roll? Thought so.
It’s set up, what now?
Here’s where I have to be vague. Your camera is different from mine. You’re understanding is different from mine. Essentially, if you can control the settings of your camera, you want to adjust the image on the LCD until the background is as washed out as possible, and the yoyo is as dark as possible. Don’t overexpose or blow out the yoyo, that’s the whole reason you built the box! If you find it easier to purposely make the image darker than you want and then lighten it in software later, do that.
I can control the settings in my camera so I use around 1/125th of a second shutter speed, an aperture of f/8, and an ISO of 400. Not sure what that means? That’s ok. Make use of your tripod and use whatever settings give you the slowest shutter speed with your camera. Many new ones have a food photography setting, fireworks setting, or any setting designed for “low light.” Yes, your 400-watt box is low light. It’s bright to you because your eye sees 15 different levels of light from white to black. How’s your digital camera? Maybe 8-10 different levels. Blacks get muddy, and whites lose detail. Your camera will never see the scene that your eyes see to the same degree. This is why you need to use a setting that gives the camera longer time to collect all that 400-watt light. A slower shutter speed will also force your auto-setting camera to do two things: first, it will force the camera to use a lower ISO (sensitivity to light), and second, it will force the camera to use a smaller opening or aperture to the sensor. Put another way, people who need glasses, but do not have them often squint to allow their eyes to better focus on distant details. Using a smaller opening is squinting your lens to keep as much of the yoyo in focus as possible in response to a slow shutter speed and lots of light. If you have a camera with manual settings, get in there and play around with them. I never read any photography books until I was in college. Experimentation is the best way to learn. All photographs are a combination of aperture, shutter speed, and ISO. There are several combinations that will be appropriate for each scene. To see what roll each adjustment plays, set two variables, and adjust the other one. Note the difference. Do you like the photo? No? Try a different combination.
Enjoy.
Notes and tips for improvement?
-
Zoom your lens all the way in and move your camera away from the yoyo so that it is zoomed in and still able to focus on the yoyo. With your lens zoomed in, you will get as little distortion as possible. The rims of your yoyo will be flat, not bowed like parentheses.
-
Position the yoyo towards the opening of the box so that you can allow the background to be slightly out of focus and not distracting. Shoving your yoyo right to the back will make your camera lens focus closely to the paper, picking up any imperfections in the fiber or shadows from the yoyo itself.
-
These results are repeatable, but bright yoyos will need different camera settings from black yoyos. One will be easy to overexpose, and one will be the opposite.
-
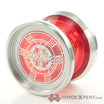
You can use sheets of tissue paper or thin paper over the openings in your box frame if you need to diffuse the light. This is good for light and raw yoyos that are susceptible to specular highlights, or rather, the often-undesirable light reflections in mirrored objects. In my photos of the Banana Hammock, you can see these plainly and even on the CODE 1, they are so distracting that they nearly obscure the engravings. Sad! A panel of paper helps to diffuse the light like a cloudy day and evens the contrast between very dark and very bright. I do not use diffusion panels, however, because I want the highlights to show off the curves of the yoyo and add some pop to the image. Too much diffusion will make your photos look perfect exposure-wise, but will leave them looking flat and dull. Sad!
Questions? Comment? Concerns? I like to write about this stuff and as a high school teacher, I like to help people. Don’t be shy. I don’t know everything, but I’ve built a thing, it was cheap, and it works pretty well. Thanks for reading.
Yes, I was a CODE 1 tester. One Drop for life, dogs.
-Alex
p.s. My photos are totally unedited. Why bother give you a guide if every one of my presented results is a photoshop trick?
