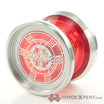
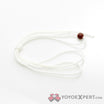
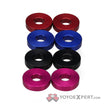
I had an extra Duncan A bearing kit, some extra washers, and a Duncan Butterfly so I thought I’d give it a try. Soft plastic yo and all the wrong tools I didn’t have high hopes. Armed with a Dremel, sandpaper, and a big drill bit I gave it a go.
All my parts.
I used a drill bit the same size as the bearing/spacers and ground into the plastic turning the bit by hand. The plastic is so soft I was worried I’d break things quickly using a drill press. I then smoothed things out with a Dremel (still on the sloppy side, but at least it’s straight). I dropped in a washer, then the bearing spacer…whew, depth looked good and I didn’t grind through the plastic to the other side.
The Butterfly is so light I didn’t think it would need much for response and the starbursts were a bit ruined. So I took a piece of sandpaper and went to work. Sanded the remaining starbursts flat and sanded the rest of the inside. I figured I could try something different if it didn’t work.
Put it together and whoa it works! With a bind the sandpapered sides work well. I needed an extra washer on one side because as I tightened it up the bolt head was causing the spacer to dig into the plastic.
The end of the bolt/nut looks weird because I tried to grind down the end of the bolt enough to get the caps back on. Still needs a bit of work.
Photo taken before fully tightening. Once tightened no bearing gap for string to catch on and sides are straight.
It works well…better than I expected. Weighs in at 39g. Fun little project, albeit a bit sloppy. Would I try it again? Don’t think so. Glad I tried it? Yep.
