


It’s usually like that. As long as when you tighten the yoyo adequately the bearing still spins freely you’re good.
3 Likes
Those are the same pads I use. They’re definitely on the grippy side, but they’re so much cheaper than anything else I’ve found. And as much as I love Permatex, waiting 24 hrs for it to cure before testing a prototype can be torture, lol.
3 Likes
I’ve printed a couple of responsive throws in 98A with a small PLA core that play well. Not sure why I’m struggling so much with unresponsive designs. And yeah, I’m more interested in the durability and impact resistance than feel, so something harder might allow for more of the rims to be TPU.
3 Likes
This is the whole reason I stopped doing flowable.
Plus I don’t actually do flowable as best as I’d like.
1 Like
Yeah, I’ve generally been using 100% infill everywhere other than the outermost 3-4mm (using modifier blocks in the slicer), which keeps the weight up but gives just a hint of squish on the outer rims.
Also FWIW, my responsive TPU with threaded PLA core design I filleted the threads pretty heavily to minimize overhangs for the TPU. I also found that using zero tolerance actually works well for threading into TPU, unlike trying to thread two stiff materials together.
3 Likes
Good to know on the TPU threads! So far on all my designs for threads I’ve used zero tolerance, no offset no matter the material but I think that’s just because I obsessively get my tolerances on my printers as precise as possible. I’ll probably need to add some offset on the threads whenever I release the designs.
I’m forever in search of more squish and just got some 75a in to test out.
2 Likes
Even though you’re doing 100% infill, what’s your wall count look like? If it’s on the lower side, you may be able to gain a little more rigidity by adding an extra wall or two. The other thing I could think of is maybe try adding two - four small vertical ridges “gussets” internally to give it a more rigid internal structure. It would allow for flex for impacts but may help with the radial flex. Just an idea, not sure if it’ll actually work lol.
2 Likes
Using 4 wall loops everywhere except the very outermost parts of the rims which have 2. Have also upped the top/bottom layers by one each from standard settings. I’ve also done a lot of tuning of the flow rate and PA to minimize gaps between lines. Internal gussets is something I didn’t consider, might need to mess with that.
1 Like
I’ve played briefly on such a yoyo (was at the club meeting last month). It works well enough, but not ideal for a 4a player since it tends to remove the bounce that they rely upon to recover from a missed catch.
1 Like
I think I’ve figured out part of the issue, and part of the solution. Even though the fitment between the TPU and PLA parts was very tight, the difference in elasticity means there can be very slight separation at the joint when the TPU flexes. You can sometimes hear some squeaking if you flex the rims by hand. I took a couple of them apart, added a thin layer of contact cement to the threads/joints, and reassembled. After letting the glue cure overnight, one of the early prototypes still has quite a bit of vibe, but it’s way better is now playable. And there’s no more squeak when flexing the rims, and it feels a bit more solid.
Now I’m wondering if my TPU rim responsives would benefit from some glue, even though they play pretty well as-is.
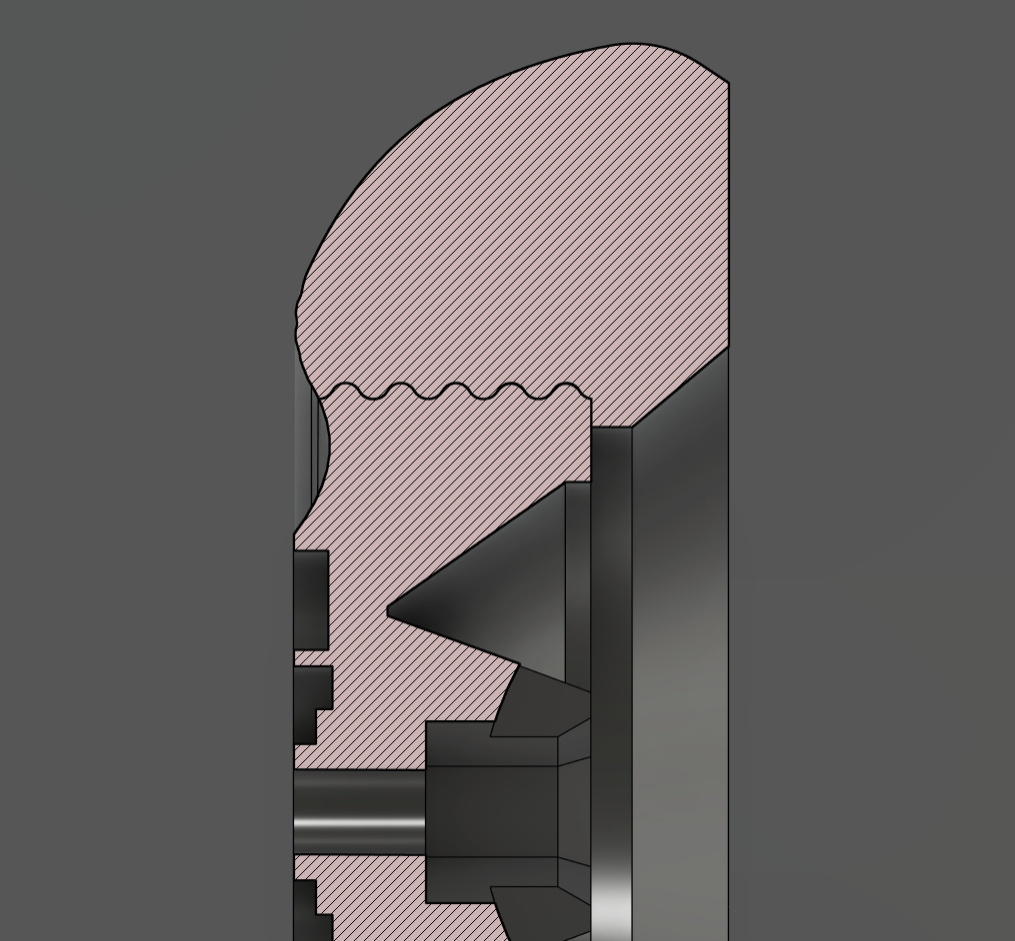
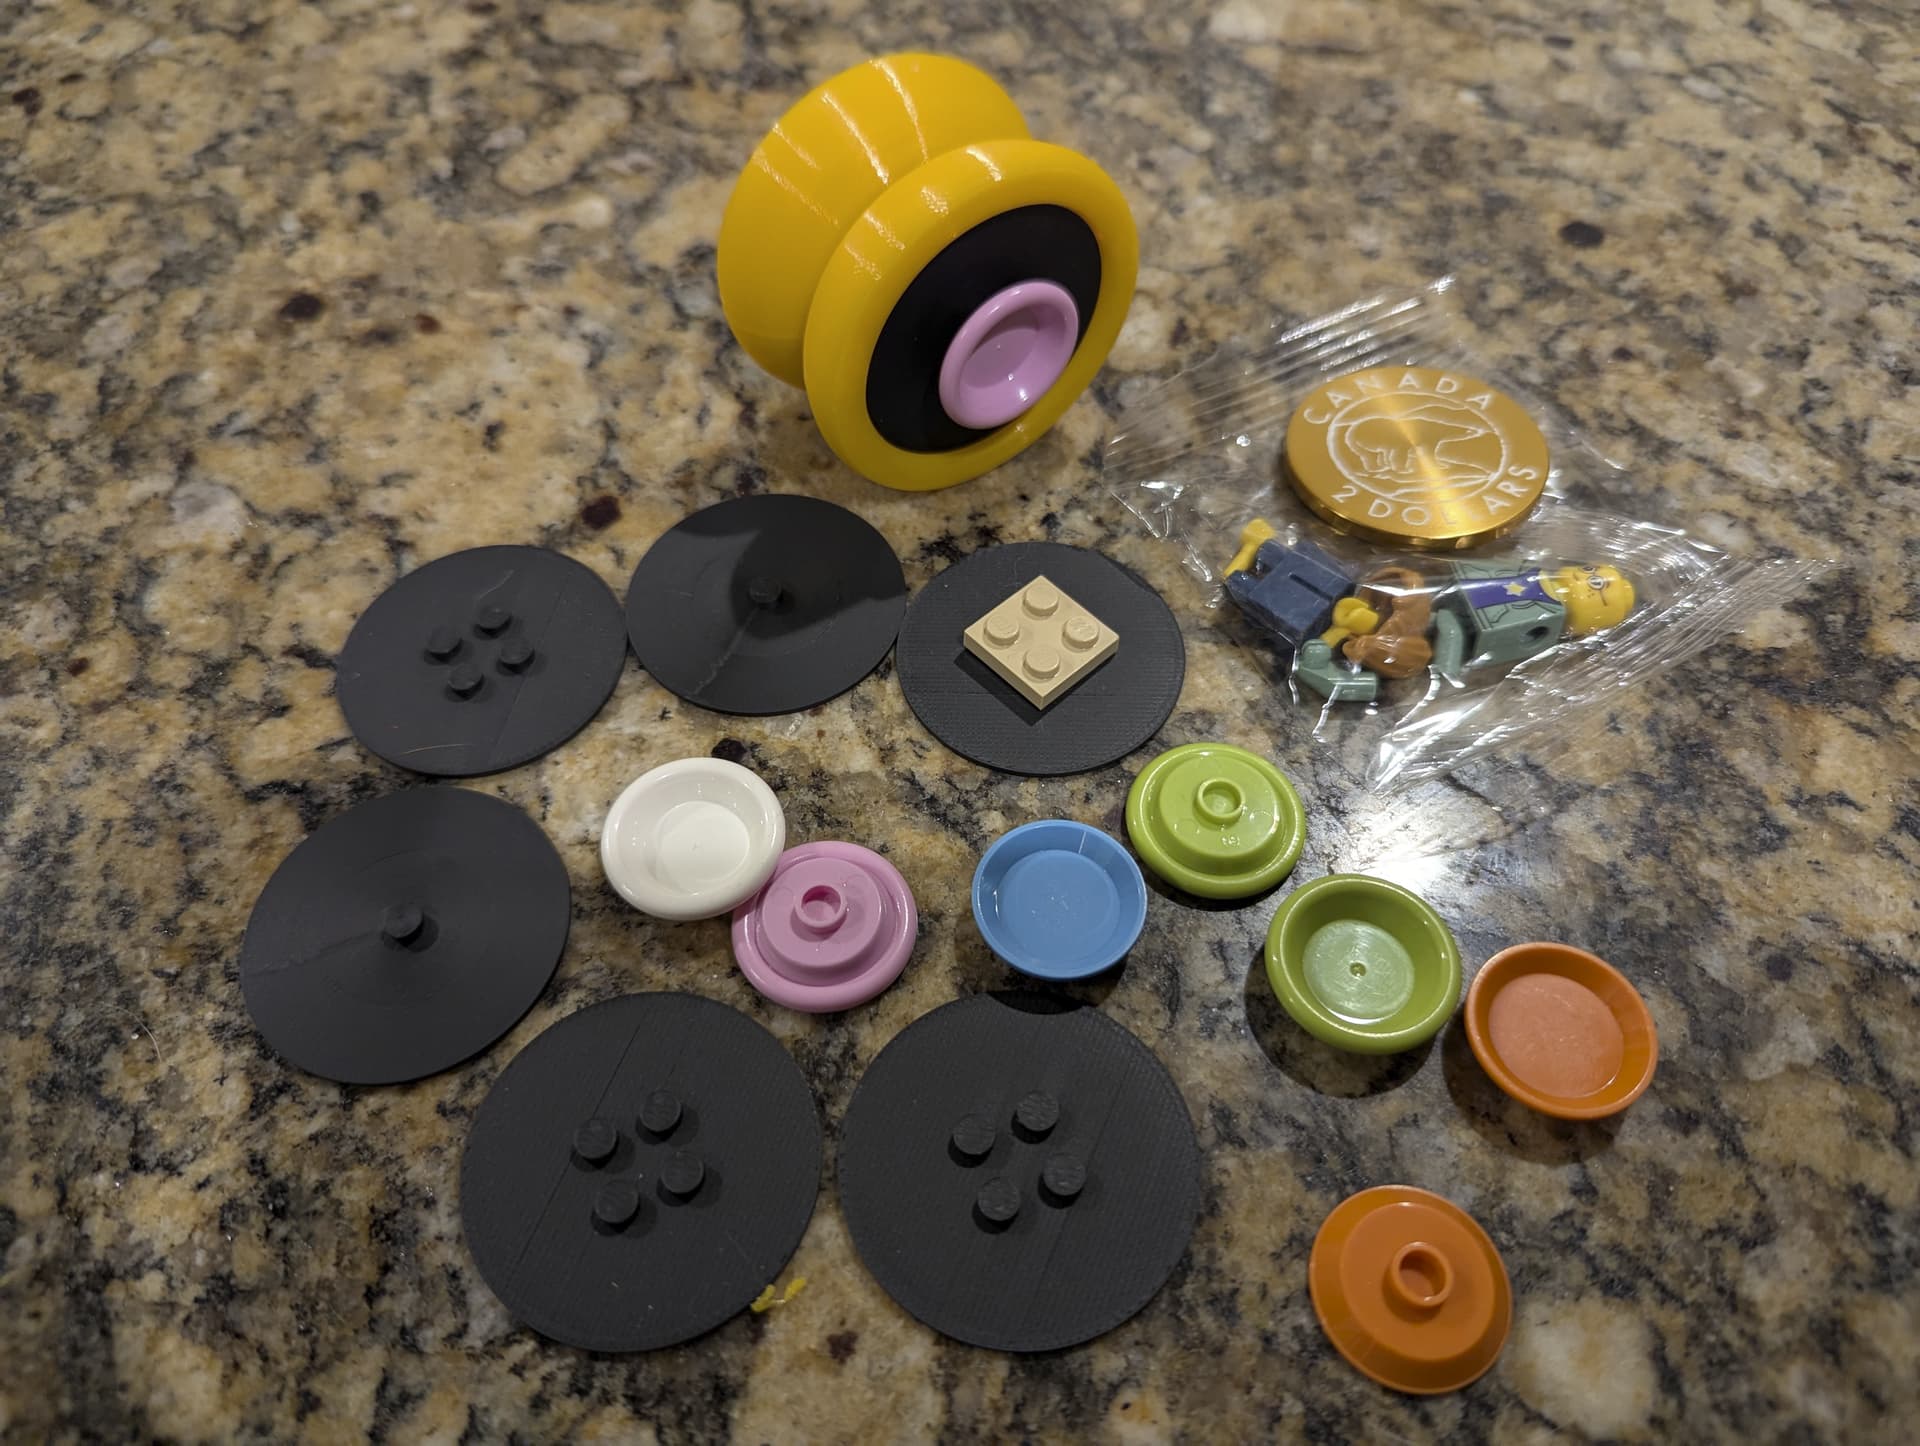
Decided that with RCS closing I needed to make some POG size caps that are Lego compatible. For anyone wanting to try something similar, all the online references indicate Lego posts are 4.80mm dia, but that’s a lie. After measuring lots of different Legos, it seems the posts are actually more like 4.82-4.84 at the top, and they have a draft which makes the base closer to 4.86-4.88. I modeled these at 4.88 (no draft) and am using a filament that I’ve tuned to be very precise, and they are just right.
6 Likes
This one has been on my todo list for a while.

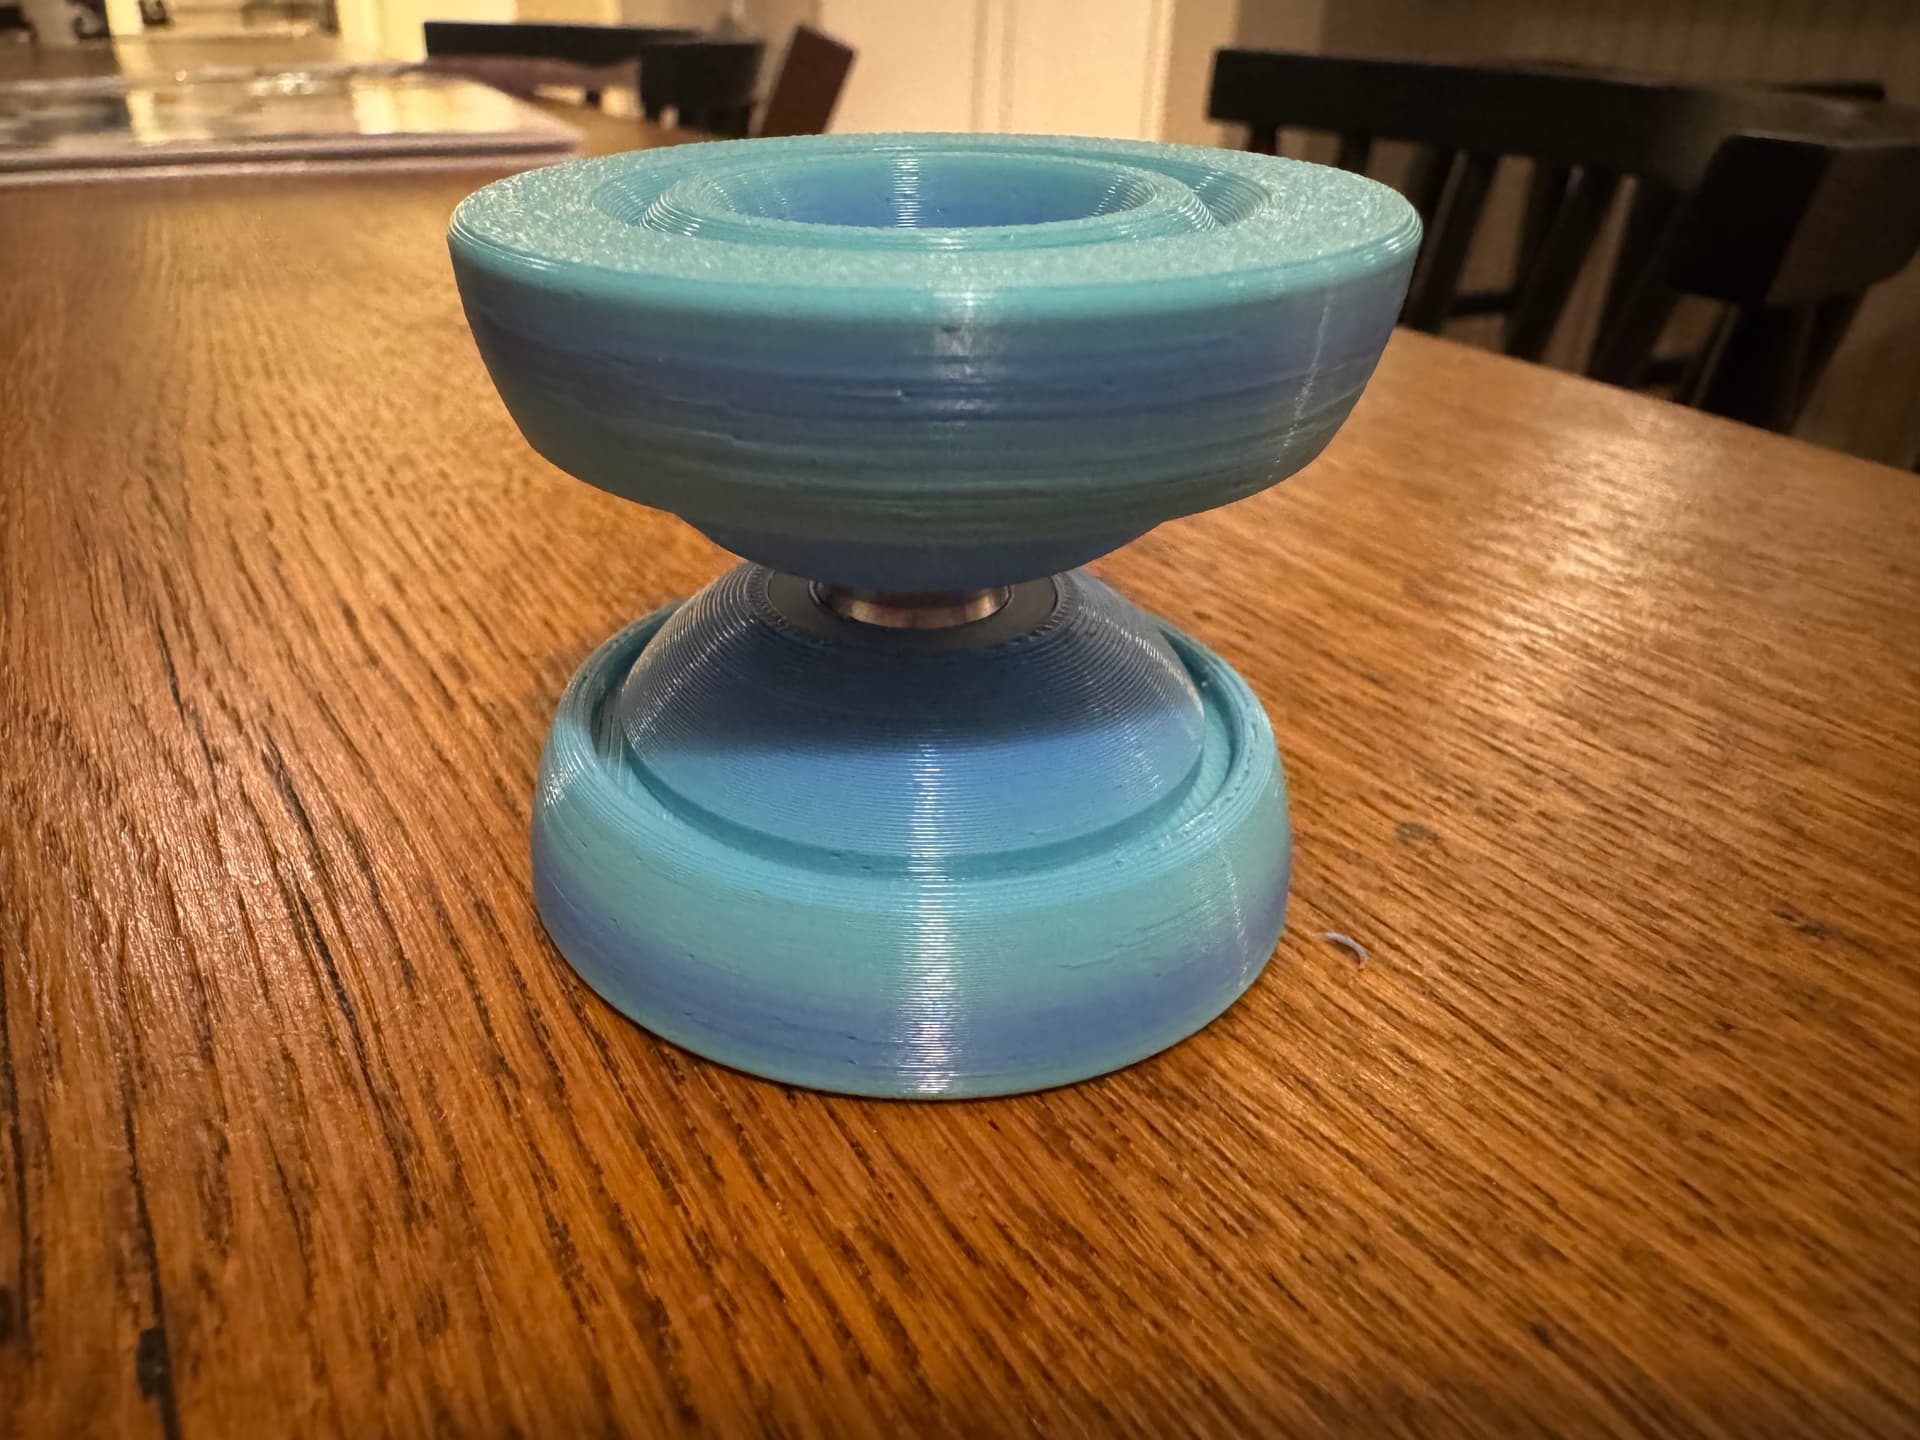
Black and gold honeycomb designed by @MinerJ, printed by me.
7 Likes
I know you didn’t ask for feedback @MinerJ but ![]()
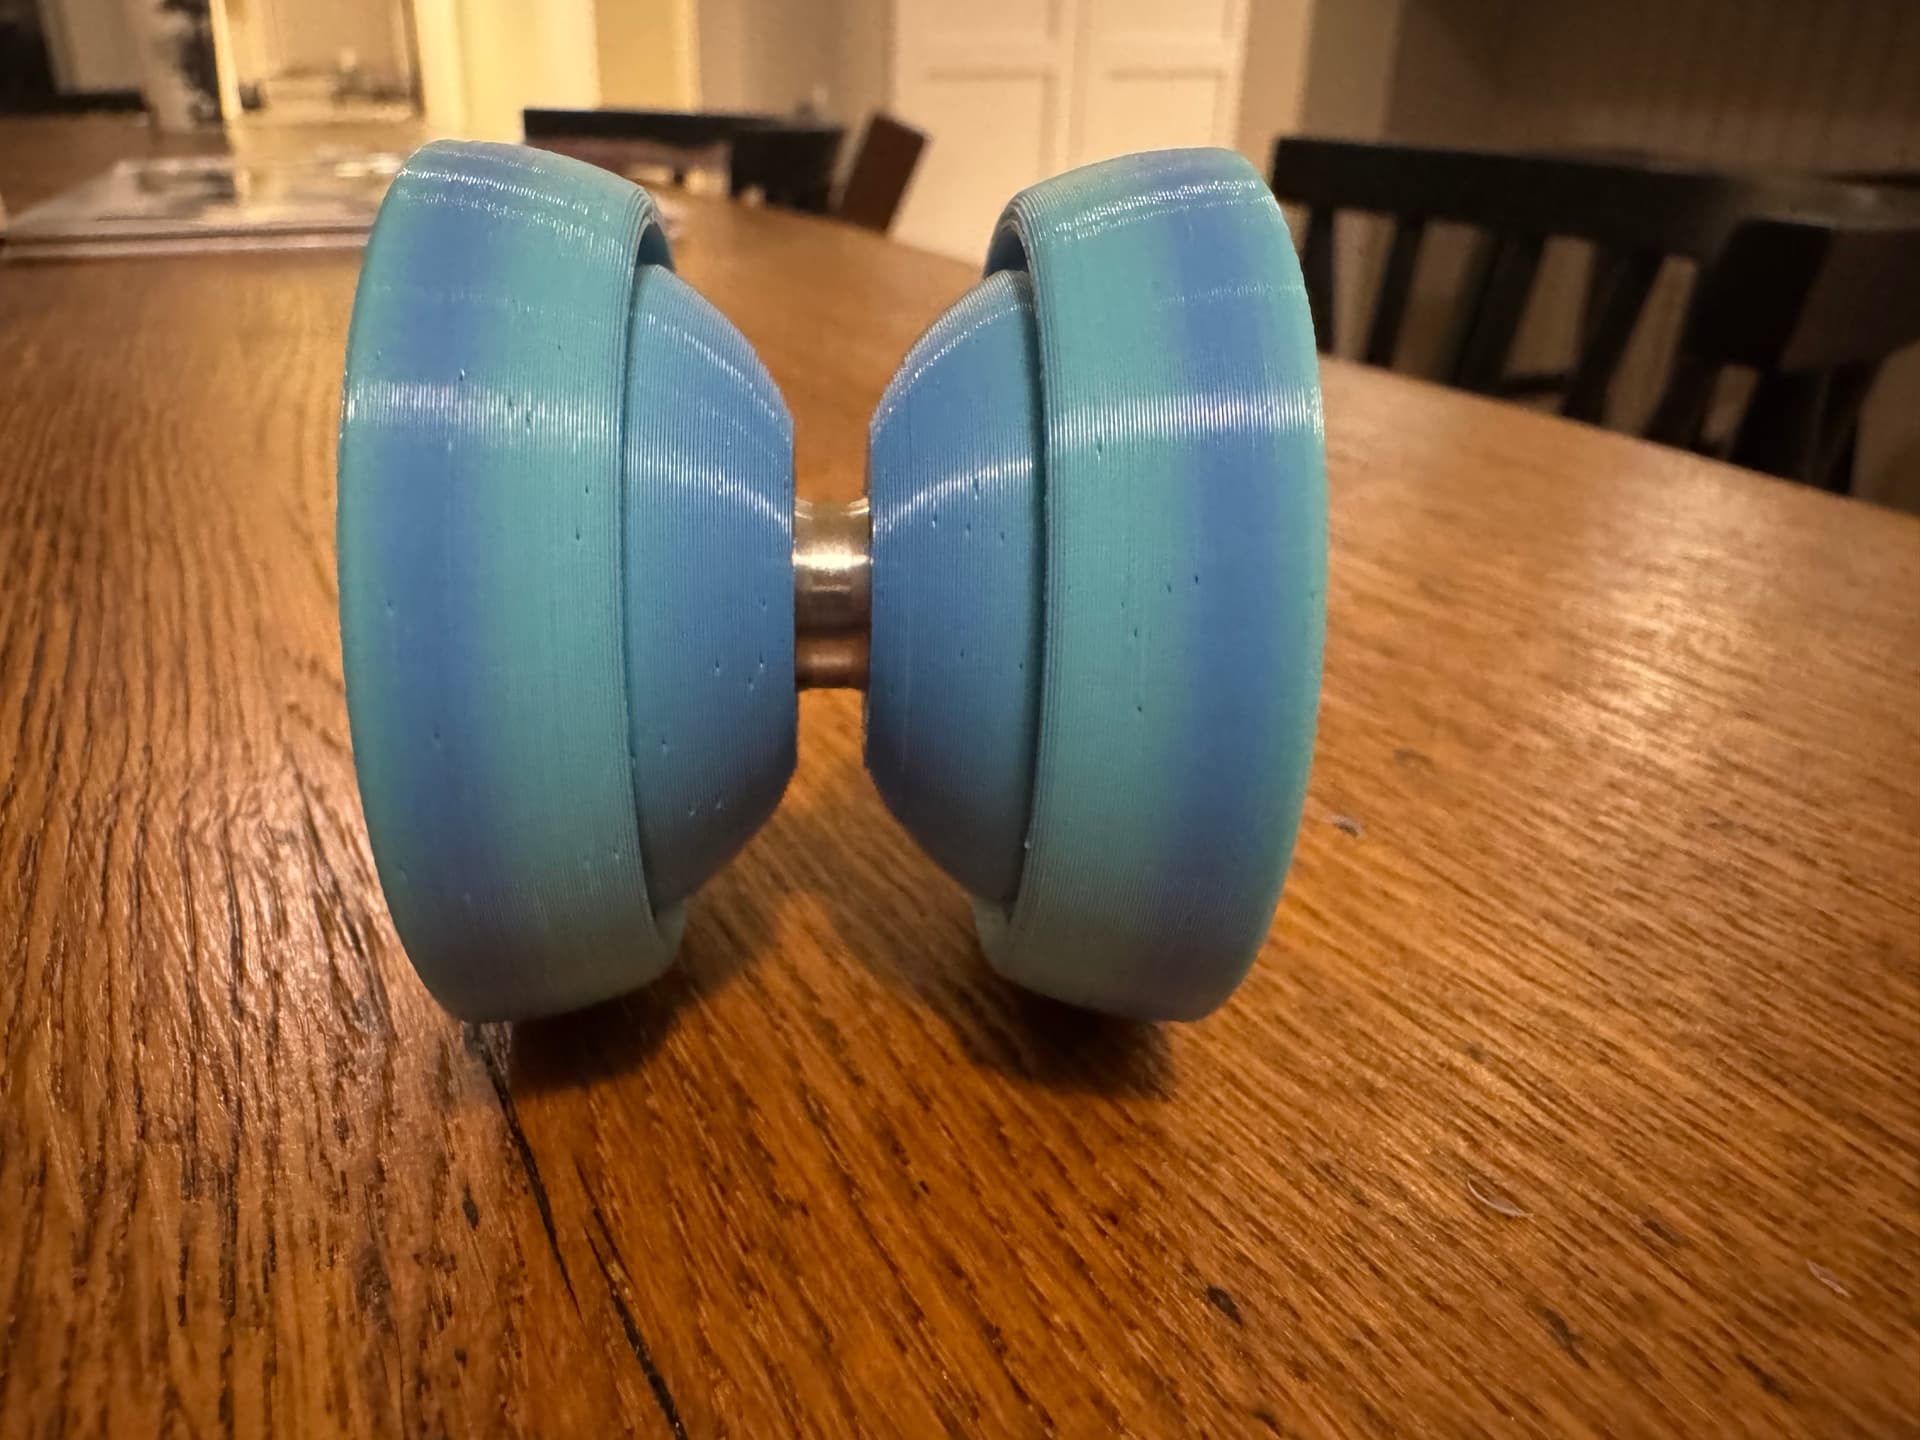
I love it! The size and weight distribution are great. The bearing seat works well. It was easy to remove supports (they were paint on, right?). I love the distinctive whoosh when I play it; it makes it feel faster.
I do think the edge is a teeny bit sharp but I also made that worse for myself when I chose a silky filament for the bottom layers.
Edit: I made the MR85 4mm axle.
3 Likes
Glad you like it! Support was automatic generation.
The edge is a bit sharp, I’ve rounded it slightly more, need to update it on MakerWorld. But even with the more rounded design there’s still a tiny sharp lip right at the plate, which I sometimes take a razor or fine sandpaper to. That applies to both the outer edge and the inner finger cup lip.
Be aware that I’ve had issues with my MR85 bearings damaging bearing seats over time. The inner races are so thin that it doesn’t take much tightening for them to cut into the plastic. I found some tiny M5 ID x 0.1mm thick washers that can help spread the load and prevent that, but it obviously then widens the gap by 0.2mm. I’ve been moving away from MR85 on plastic bearing seats for that reason. I’ve had better luck with the thicker inner races on A, MR95, or MR84.
I’m torn about the sound, part of me is annoyed by it because it’s the sound of air resistance killing the spin, but part of me thinks it sounds cool, lol.
4 Likes
My MR85 Honeycomb bearing seat is holding up good, I am being very ginger with it though as you suggest. I try not to take it apart, and have it at the correct gap and try not adjusting it. If I get a knot, I use a knot picker or just cut the string.
I’m treating my Waffle Stomper the same way as it also utilizes the MR85.
I am in hopes that by doing this they withstand the test of time as the two of them are my go to throws
2 Likes
Profile is beautiful.
1 Like
Thank you!
I want to print this but go out of town soon. So I won’t get to till I’m back
1 Like
Got this today from @MinerJ. Just blows my mind what you all are accomplishing.
Responsive 1A machine
And it does 0A perfectly (I just screwed up all my 0A tricks after this trick and they got cut out)
9 Likes