


Thanks everyone.
Credits should go to modman10 as the specs and shape are from him. I only responsible in the materialization of the yoyo :).
And for the play characteristic, I also find it difficult to describe. And I can’t find a near match, in terms of the play characteristic, with a few plastic/delrin yoyos that I have. But when come to solidness alone, my Lyn Fury comes into my mind, hmmm… I think modman10 is right, it is a combination of floaty, solid and fast.
Quick question, do you use a manual precision lathe for your work, or a CNC? Stuff looks too good to be done on a manual! Also, how do you attach the axle and bearing seat? If its a very tight fit, how do you press the inserts in?
Thanks for the question. I use a manual mini lathe for all my work. I believe anyone with lathe operating skills can make similar or even better stuffs with sufficient practice and correct tools. The axle and bearing seat are actually one piece aluminum rod machined to the desired dimension and press fitted into yoyo body by using a rubber hammer (mallet). They are tight enough for normal screwing and unscrewing the yoyo.
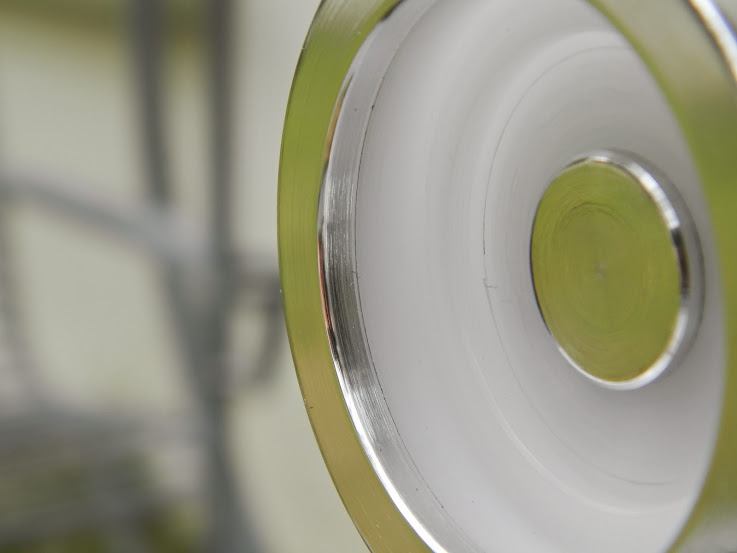
The last one looks kinda fragment uragment esque. I like it.
Well Done!
Hi all.
It’s been a long time since my last post. Life is unpredictable, but laziness causes almost all life events (both planned and unplanned) proceed or end bitterly…
Okay, less talk, let’s begin. I would like to share with you all my second custom made yoyo for a forum member here.
The requirements:
Shape and profile: YYR Messiah
Diameter: 53mm
Weight: around 65 g, rim weighted
Width: 42 mm
Bearing gap width: 4.2 - 4.4 mm
Play: horizontal (low wall) and finger spin (flat inner hub)
So I came out with a drawing below with aluminum weight ring:

Design approved, let’s turn on the minilathe…
Some photos during the making of the yoyo:
First attempt, failed ![]()

Let’s do it again… This time, okay. Continued with another half.

Cub view, without the rings.


And finally, work done!

More photos:


https://lh4.googleusercontent.com/XUjowvMSm3zoIxroPaBcxwf6sZBaxA6TprvONBtOU7c=w487-h366-no


Time for testing, oh no, it vibes :-. I do expect a certain level of vibe due to limitation in machine precision and human error, but the vibe is a bit too much for me. I was so worry that the customer wont like it. In terms of play, I would say solid is the main character of this yoyo.
Here are the actual specifications:
Diameter: 53 mm
Weight: 65.05 g
Width: 41.95 mm (0.05 less than requirement)
Bearing gap width: 4.25 mm
The forum member received the yoyo a few days ago. And here’s his comment:
“It is pretty smooth for a plastic, and seems to be machined well”.
Phew! What a relief. That’s the pressure I have to bear with when I make a yoyo for someone. But I also enjoy the satisfaction seeing delrin and aluminum blocks turn into a yoyo and when it is liked by my precious customers.
Okay, that’s all for this time. Thanks for reading and hope to hear your comment.
ck
Dude you are just amazing man. Keep up the good work.
Wow! So you used a lathe setup similar to the one described in kyo’s lathe guide if I’m correct? That’s amazing! The last one reminds me of the Rally ![]()
I’ve been looking into doing something like this myself. How would you recommend I get started? It seems like an awful lot of information to process at the same time!
Bestow me your skills ![]()
Allright, someone went and 1-uped me…
Expect a message from me…
1 Like
Those are coming out really nice! I can appreciate the difficulty having made several now myself. ![]() Your’s are 10x better!
Your’s are 10x better!
Keep up the awesome work!
1 Like
Hi everyone!
I am back and this time I will show you three of my latest HT yoyos and a counter weight.
First one is my latest custom made HT yoyo for a forum member here. His requirement was very simple: a yoyo design based on my favorite HTYY that I have made up to that point and weight must be 67 - 68g. I have chosen my HT#16 as a base design. The reasons for this decision are that it has most characters I like in a yoyo, and most importantly it is comparatively easy to machine, hence less work and minimize human error. I redistributed its weight placement and increased it to 68g.
Having completed the design and getting approval from the buyer, I immediately started the machining work. First attempt, failed! ![]() It has terrible vibe and wobble. Reasons being bad weight placement (IMO) and one of the halves was not centered. I have made a few weight rings including a pair of Al ring to get rid the wobble but no good. So I have to discard this one and redesign a new one with more balance weight placement. This one turned out quite good but unfortunately I made a few scratches on the rim and hub, although the buyer agreed to take it, I decided to keep it to myself and made another one for him. After almost 2 months of work, it was finally completed this project and shipped the yoyo to this patient, supportive and understanding buyer (many thanks). Here are the final specifications and photos:
It has terrible vibe and wobble. Reasons being bad weight placement (IMO) and one of the halves was not centered. I have made a few weight rings including a pair of Al ring to get rid the wobble but no good. So I have to discard this one and redesign a new one with more balance weight placement. This one turned out quite good but unfortunately I made a few scratches on the rim and hub, although the buyer agreed to take it, I decided to keep it to myself and made another one for him. After almost 2 months of work, it was finally completed this project and shipped the yoyo to this patient, supportive and understanding buyer (many thanks). Here are the final specifications and photos:
Weight = 67.95g
Diameter = 56.1mm
Width = 42.7mm
Bearing gap = 4.7mm (based on calculation)


The black and white…


The second one is the discarded HT yoyo that I mentioned above. I was lucky that I finally managed to produce a suitable ring for this yoyo. What I did was to made a ring that increased its center weight and stability. Now it is stable with reduced vibe and wobble. I am using it for learning 5A tricks. Here are the specifications and photos:
Weight = 63g
Diameter = 56mm
Width = 43.6mm
Bearing gap = 4.6mm (based on calculation)
Here are some photos showing the yoyo without weight rings (attached to a YYF Catalyst half):


Theses are the photos of the complete yoyo:


A side by side comparison of the first (right) and second yoyo (left):


They look similar but actually the first one (shipped to buyer) has thicker rim and more center weight.
Now, the third one, a delrin yoyo with aluminum rim just like most YYJ delrin-aluminum yoyo. I have always wanted to make a yoyo like that but I was unable to do so due to some technical issues. Having made more than 20 yoyo, I think I am ready to challenge myself. As a first attempt, my focus was to attach the aluminum rim to delrin body. Personally I think I have achieve this goal but the yoyo does not play as good as expected due to weight placement (again, IMO). It has a little bit of wobble. Anyway, I am still happy with it. Here are the specifications and photos:
Weight = 64.2g
Diameter = 50mm
Width = 43.3mm
Bearing gap = 4.7mm (based on calculation)


Comparison between the second and third yoyo:


Ok, the last one, it is a counter weight that I used together with the second yoyo shown above. It is an unplanned project, it came out just happen that I was thinking of using the second yoyo for learning 5A tricks and thought I can made a counter weight for it. I studied the average weight of a set of counter weight came with my FHZ (which is about 12g) and gave it a shape that I though should be comfortable to hold and aid its movement at the end of the string (I wonder if there is any studies on the suitable weight and shape of a counter weight that help performing 5A tricks). Here are some photos:


That’s all for this time. Many thanks for you interest in reading my post. And your comments are most welcomed.
ck
Try not to put the weight too outward (width wise). I did that mistake before thinking it would be more stable, but it’s actually the opposite since it’s not only want to spin on its bearing axis, it also increase the tendency to spin “sideways” against the axis. In other words, the wider the weight placement, the more it want to self stabilize against the axis. Think about it as if you wanna make a really wide yoyo from a pencil, instead of spinning on the graphite axis, the weight makes it want to spin sideways, so either put the weight closer towards the gap or increase the diameter.
I hope that makes sense.
2 Likes
Have you ever considered using side effects in one of your Yoyo? It seems like it could be amazing if done right if you used that in a Yoyo.
This is the coolest looking yoyo so far! keep up the good work!
Have you tried making an organic shaped yoyo? Maybe it’s just me, but that seems like something I’d love to see from you.
Ha! I love the panda.
That one with the weight rings like a yyj looks so so good. It’s a shame I don’t have the skills or tools to do this.
Many thanks for all the positive comments/advice so far…
abby1371,
Yes, I have considered using side effects in my yoyo, but it was far far beyond my capability, even with my current tools and skill :'(. It is very difficult to machine (manually) a yoyo hub to accept side effects (but it is not impossible as jon walker has done it on his first hand made titanium yoyo). Instead of making use SE, I have adopted the idea (EX-System by YoyoJoker, to be exact) and made my own HT SwapBody:
Hand turned yoyo: HTYY#0.44 (reply #186) - #45 by ckron - Yo-Yo Mods and Maintenance - YoYoExpert (reply #58)
Thanks for the suggestion.
RyN,
Thanks for the compliment.
I have tried making an organic shaped yoyo (FHZ is one of my favorites, I really like to made a delrin version of FHZ), but it was not good. It is not a true organic shape, but I would describe it as “stepped” organic shape :P. Here’s some pictures:


It was one of my earlier projects when I was exploring and developing my lathe skills. Even so, sadly, I still can’t do it right with my current capability. I may try to make one when the time is right.
Thanks for the suggestion.
I have been playing with my minilathe for about 10 months now, and I have made 20+ yoyos (including a looper) out of delrin blocks. I think I have tried to materialize most, if not all, the idea that I have before acquiring this little machine. Having done all these so far, my focus now is to produce a simple yoyo that is comfortable and fun to play with. A simple design will also means easy machining and less human error. Hopefully I can show you all the outcome soon.
Thanks again,
ck
Wow, these look great! How long does it take you to make one?
Hi, Zortwil.
Thanks for the comment. The time taken to make a yoyo depends on the design complexity (number of steps, aluminum rings etc). I used to take around 24 hours of work to complete one. But as my skills and familiarization with my machine and tools grow, I can complete a yoyo in shorter time. I just make one (a simple design, which I have not shared in this forum) in about 12 hours.
Hi everyone.
This is about the yoyo I mentioned in my last post…
I mentioned in my reply#96 that I would like to make a simple yoyo that feels comfortable in hand and fun to play with. I think this is it, my best shot so far, not about how it plays, but it is created with all my thought ,experience and skills that I have developed/acquired in the past 10 months. So, this is the one, my HT version of “54”.

Specifications:
Diameter = 54mm
Weight = 64.78g
Width = 41.65mm
Gap = 4.65mm
Photos:


Honestly, in terms of play, I think some of my previous models with weight rings (especially HT#0.15 and HT#0.16) play just a little bit better, but I prefer this yoyo over the others.
Thanks for reading this…
ck