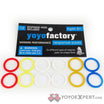
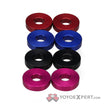
I started looking on here for the bazpad/chazpad guide since I always found them to perform a lot better than old style dif pads. You’ll notice on older throws like anti-yo that they don’t fit your standard 18mm pad and instead took thin sticker pads.
This is the guide copied from another forums old post that “IV” had made. I couldn’t find it on here so wanted to have it here in case someone else needed help with making some decent pads for their old throws. Of note is that plastidip before it has dried into pad form is dangerous so handle it with care. People have also made similar pads by using strictly plastidip as the sticker but mixing with naptha makes it easier.
First of all, lets get this out of the way. Baz pads, or chaz pads; whatever you want to call them are all made from the same chemical compound. The true identity of this compound is unknown however it is sold in many major hardware stores under the copyrighted name, “Plastidip”. This chemical compound, when mixed with another compound known as “Naptha” produces a substance that can be poured, spread lightly and made into pads of decent thickness, durability and texture for response applications in yoyos.
The problem with this is that the true ratio of Plastidip and Naptha has never been released to the public. It seems as though considering neither of the makers of these pads have no true secret ingredient; the actual process of making the pads is the true trade secret. Knowing this, breaking the code on what that ratio is might just further insight as to just how thick this compound should be.
Luckly for you, over the past few weeks, I have conducted many experiments with these chemicals, dry and wet in order to figure out this mystery among many others. There also seems to be the little detail as to how the pads cure without causing air bubbles from the Naptha. When the Naptha evaporates during the curing and/or hardening process, the vapors escape through the substance, causing it to bubble somewhat, leaving small blemishes on the surface of the pads. The less Naptha is used, the less bubbles. The more Naptha, the more bubbles. You get the point. The makers of chaz pads seem to have found out a method of drying this material without causing air bubbles, more than likely through some sort of pressurized process, either that or they are utilizing the raw Plastidip, without the Naptha and simply flattening it, rather than pouring it; although this would still cause some air bubbles, just not as many.
Regardless, the pads play the same, they just don’t look as nice. This is sort of like any homemade item; technically it’s the same thing, it’s just small differences. Now lets get to the heart of this blog, how to make them.
Through my experiments with the substance, this is how I create the pads myself.
Tools / Ingredients::
-Plastidip, any color, found in hardware stores.
-Naptha, a thinner or solvent found in the paint isle at most hardware stores
-An X-acto knife
-A 1/2 inch hole punch
-A 3/4 inch hole punch
-A completely flat piece of polished metal, fiberglass, acrylic, or plastic
-A spoon, preferably one you don’t need anymore
-An adhesive, 3M spray does work but only temporarily, once it dries, it looses it’s adhesive properties. Use transfer tape or a sticker maker.
-A ziplock bag
-A Large Mason jar
-An old friction sticker, .015" thick.
-Wax paper
-Duct Tape or Masking Tape
Open the can of Plastidip, here you should figure out that once you open the can, there is no way to seal it. That may have been a problem, however. If you’ll look at the ingredients, we have a Mason Jar. Pour the contents of the can into the jar and stir. Begin to add Naptha into the mixture, the finished product should be roughly the same consistency as a freshly poured glass of buttermilk or hot syrup, however only get it nearly that thick.
take your spoon and put sample dips of the substance onto a small sheet of wax paper, adhere your old friction sticker onto the paper. Continue to add more Naptha into the solution until you can effectively dip the substance onto the wax paper and it be the same width as soon as it levels out.
Throw the wax paper with the samples on it away, keep the sticker.
Take out whatever large board I told you to obtain, whether it be glass, metal, plastic or what have you. As long as it is long, completely flat and somewhat polished, it will work perfectly. tape off a square area the size you want the finished area to be and begin to dip the spoon into the mixture and onto the surface. Spread as you need to, but try to keep it as uniform as possible. Place the board on a completely level area and leave it.
Go to sleep.
Wake up.
Take your x-acto knife and cut out the square area you dipped, now slowly but carefully take the knife and go under a part of the mixture, only a bit just so you can grab it. Once you get a firm grasp, begin to peel it off. This stuff is tough, so don’t worry about breaking it easily. It doesn’t tear when dried.
Place the old friction sticker onto it and begin to make stencils of where you plan to cut your stickers, punch the holes out, smallest first. until you have as many as you wish to make. Use any adhesive you wish, anything works. Put them on a yoyo, and well…
yoyo with it. Isn’t that nice?
Enjoy.
