This thread is to teach you all the things that come into consideration when making yoyo string and using a yoyo string. The topics I will be going over are, “What is a yoyo string?”, “How do i make a string?” (obviously), how you can make different sizes of string, tools you will need to make a string, and materials you can use to make string out of. Also feel free to throw your bit in. So let’s get with it.
What is a yoyo string?
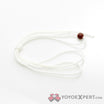
A yoyo string is a continuous piece of string made from multiple threads that is twisted, doubled over its self than untwisted back onto its self. A yoyo string has two loops, one is the axle loop the other is the finger loop. It is also know as a slip knot. The slip knot is made by first making a loop. The loop is made by doubling the sting over its self about 4 inches at the end opposite to the axle loop, than it is tied in a knot. The excess string is than cut off and discarded. Once you have this loop, it is laid on top of the string than the string is pulled though the loop you have just created an adjustable slip knot. Then the string is put on to the yoyo. This is done by untwisting the axle loop and slipping it over one half of the yoyo than letting it twist back onto its self. After the yoyo is wound up than it is applied to the finger via the slip knot. The string is placed between the first and second knuckle on your middle finger, or in some cases on the first knuckle. The proper way to put the string on it with the the the double string of the loop pointing towards your pinkie finger. This will not allow the string to slip around the finger whilst trowing or looping.
How to make a yoyo string.
There are many videos on the internet that will help you out. Here are some of the best that I have found and learned from.
There is of chores the most famous one by Xela.
What he doesn’t tell you is what string to use and how to make or get your tools or how many times to wrap the string around the anchors. Those things I will come to later but right now we are just getting the process of making a string down. Here is the process.
1. Wrapping
You will need two anchors to wrap the thread around. You can use a nail in a bored, you can use a chair if it has something to loop the thread around but what I use is really simple, which is the way to go. I use a hook that is tied to a nail that is in my bedroom wall. And for the second anchor (or the anchor which you slip the string off later for twisting) is just a chair with a small post on it. I will go into how to make the hook later on. Then this is where you tie on your thread. I tie the thread twice onto the hook to make sure it doesn’t come off. Than I wrap the thread around the two anchors it however many times that is needed. The two anchors should be around 11 to 12 feet apart just to make sure you don’t get your string to short. You are going to be doubling the string over its self so it will be half the length it was originally.
2. Twisting
Now after you have your thread wrapped around your two anchors you will need to twist one end. Now there are just a few methods of twisting the but they all basically do the same thing, twist your string. You can do it the long way by taking the string off one of your anchors (preferably the one that is like a post or something, not the hook). Then you slip the loop that you just took off over a bar of some sort about 8 inches long (hey that sounds like a pencil) and twist it clock-wise. Now that’s the slow way and it takes you about 20 minutes to make one string. We are in the 21st century so let’s get to the power tools. Get a drill of any sort (I recommend a corded drill because cordless drill takes time to recharge and putt out on you most of the time). Also corded drills are faster with higher RPM’s (rotations per minute). Now depending on what drill you use makes how long you should twist the string for. I use a high powered drill and spin my string for about 30 seconds. However not everyone has a high powered drill so a good way to tell if you have spun it enough is if the sting decreases in length about 10 inches. This is the end of the twisting step.
3. Doubling over and untwisting.
Okay now that you have your string twisted I will tell you how to double it over and the tools you will need for this. The only tool you will really need for this is a weight. This weight is basically to weights attached together by a string. As I have side before I will go into further detail later. What you do is unhook the string that is on your drill and just hold it taught. DO NOT LET GO OF IT! Otherwise you will be wasting a lot of string and have to redo the entire process. Next you will need to place your weight onto the string. Have one side of the weight on one side and the other on the other side as show in the video. Now whilst holding your string with on hand and holding your weight in the other take the string down to the hook. This is the doubling it over part. The weight should be in the area that loops around the axle or the axle loop. Now take the other end of the string off of the hook and hold it together with the hand that is also holding the other end. You have now doubled the string over its self as seen in the video. Next as seen in the video hold the weight down at the bottom and let go. This is what makes the string spin onto its self. Let it spin until it stops spinning completely. Last just tie a knot in the finger loop so it doesn’t untwist. Just a regular ol’ knot. Congratulations you have made a uncut yoyo string.
4. Cutting the string
Most of you know this already but I am still going to put it down for new players to read. The proper length for a yoyo players yoyo string is from the ground to his/her belly button. I personally like my string a bit longer though. What you do is put the string on your yoyo and pull the string up to your belly button. Next you go about 3-4 up and fold it over and tie a slip knot as depicted in the “What is a yoyo string?” section. Then simply cut off the remanding string. There you go a working yoyo string.
Different sizes of string
Okay most of you know there is a type 4, 6, 8, 9, and 10 string right? Well how do you make different sizes? Well you have type 4 which is mainly for one specific yoyo(which is the mighty flea). It is thinner than all of the others. Do not quote me on this but from my reserved the bigger the type is the thicker the string. To make a regular type 6 I just go around the two anchors 6 times. Really I can’t get to specific with this because I don’t want to give you all false information. But i can tell you that size 4 is mainly for the mighty flea yoyo. Size 6 is the preferred size for most unresponsive 1A players, 2A and some pros use it for 5A. Size 8,and 9 are used for 3A mostly. And size 10 is used for 5A a lot. But really seeing how you are making your own custom string try it thicker or thinner and see what you like.
Tools used to make string
Okay here is a list of the things you will need to make a yoyo string in all.
- Drill of some sort.
- A hook to go in the drill.
- A weight.
- 2 anchors to wrap the string around.
- Thread (not really a tool but i just wanted to put it in here.)
- (Optional) Somewhere to hang the string whilst it is un-spinning.
Okay we have talked about the drill and what type a drill you need. I use a Black & Decker corded power drill. I can’t show you the pictures right now but I will have them up ASAP. I will have a picture of the drill, the hook that you put in the drill, The hook on the wall, the post (aka anchor), The weights, the thread i use, and the place I hang my string at to spin out so I can go on and make another string. But however I do not have the program to get those photos on this computer so I will do that later.
The drill hook
The drill hook can be basically any kind of hook you can find. I made my hooks out of wire from a coat hanger and the casing of a pin. This is a good design in my opinion because it comes out of the drill easy and lasts a long time. Here is the picture.
The weight
The weight can be anything with two weights and a string but the simplest way is as Xela showed you in his video. Here are some weights you can use or make.
The anchors
The anchors I use are a hook in the wall and a chair with a post on it. A anchor is just basically one of the two points in which you wrap the string around. Here is the picture.
Yes I know my wall is dirty.
And here is the chair.
The thread
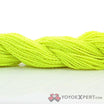
You can use pretty much any kind of thread. I use 100% spun polyester thread. It’s durable, soft and long lasting so it makes a good choice for yoyo string. You can pic some up at Walmart or your local shops can order it for you if you ask. Just make sure it’s a local family owned shop because they will more than likely order it for you rather than Walmart or somewhere else because they think they have far greater things that are more important to you than your request. Believe me, I have tried it. Walmart has some thread but not a lot so if they don’t have the thread you need just do as I said above. I tried to put up the pic of the thread but it said error so I will try again later on.
The hanger
This part is completely optional, I just do this because it makes string making faster. The hanger is well a hanger with two closes pins on it that you pin your yoyo string up into wile it is spinning so you don’t have to hold it up and so you can go on to make another string. You DO NOT have to do this I just wanted to throw it in there. Here is the pic.
Materials for string
Okay we are at the last segment in my how to guide. (Finally this has taken forever). As you know most strings that are produced are either made of cotton, 50% cotton 50% polyester, or 100% polyester. You can use any of these materials but you can also use nylon, any mix of nylon and other materials and in some rare case I have tried out fishing line(doesn’t work that well). So here are the property’s of all these strings.
Cotton
Most of you know that cotton is consider a beginner string and is not widely used in advanced yoyoing. But cotton is great for learning your first tricks and is rather cheap so it is also good to practice your string making technique out on. It is soft to so if you have really sensitive fingers or hands cotton is for you. Cotton is also known to not last near as long as other materials so I wouldn’t use it that much. If your new to yoyoing cotton is for you though.
50/50
50/50 string is a mix between cotton and polyester. It is also known as slick string. Hints the term slick six for 50/50 type 6 string. It has both qualitys of cotton and polyester. It is soft yet lasts long, really flexible yet tough. If you want a string that will last a good while and be softer that plain old polyester 50/50 is for you.
Polyester
polyester is believed to be stronger than both cotton and 50/50. It is a bit rough because well polyester is plastic. Also it’s not a good idea to use on a wooden yoyo because it has been known to melt from the friction. It is the strongest of the 3 mass produced strings. Some say it is also more ridged than other materials but I guess you just have to take that in mind for yourself. A lot of pros use poly for its strength. So if your throw is a string spiting, fire starting, finger snapping throw poly is for you.
Nylon
I can’t tell you much about nylon because well I have never made as nylon string. All I really know is they they last for a really long time and don’t break without a good fight.
Well that is my guide to making yoyo string. I hope it helps you understand how to make a string and learn what tools are needed to make a string. I really hope you like it because I put A LOT of time into this and I really want it to help ( by a lot of time I mean from 11:09 AM to 2:36 PM). So about 4 and 3/4 hours. I will have those pictures up as soon as I can. Also feel free to point out any punctuation, spelling and grammar errors, so I can make this a better thread for you to learn from. And if I left anything out just let me know. Well guys later.
Keep it spinning™


